Roasted Sweet Potato and Lentil Curry recipe

This a great detox dish if you’re fed up of heavy meals and roasts after Christmas. It’s naturally sweetened by the roasted sweet potatoes, and brightened with lemon or lime juice. My daughter happily scoops up this dinner with her tiny 4-year-old hands, relishing every bite. She even asked for it for lunch, declaring she hates sandwiches and needs lentils and rice. It is a perfect combination for young eaters – easy to eat independently once mummy mixes it together so the rice is coated.

I like the texture and sweetness that oven-baked sweet potato adds to this recipe, and the kids do as well. I’m usually the kind of cook that likes a one-pot meal, but the added baking dish is totally worth it for this. The bonus in the winter is the warmth to be gained from 45 minutes of a high temperature oven. Yes please! This recipe includes carrots, sweet peppers and peas in the rice, so it packs a veggie punch. No meat here, but you could add some tandoori chicken from my previous recipe if you feel like you need it. Lentils provide plenty of protein, though, so we don’t miss the meat. Serving it with a bit of Greek yogurt also adds protein, and creaminess!

I must admit that I don’t measure my spices – I add in dashes – so the measurements in the recipe are approximate. You can use a tandoori spice mix, garam masala or a curry powder that you like instead, but the below spices are those that I find work best with this recipe, so I dash them in. If you prefer, you can add about 1 tablespoon of your mix of choice instead of those below, but I encourage you to try your hand at a bit of dramatic flair and pinch, dash or sprinkle right into the pan.

This is best served with rice; I use jasmine rice because you don’t need to rinse it and it’s a straightforward 1 rice to 2 water ratio. For curry, I like to add frozen peas and a dash of Chinese Five Spice to cook with the rice for the aromatic favour it adds. Whether using a pot or rice cooker, I recommend layering the frozen peas first, then a tab of butter and sprinkle of five spice, then the rice and lastly the water. It saves the rice from burning to the bottom if, for a multitude of mom reasons, you can’t get to it right on time.

Even on its own, this lentil dish is delicious and can be spiced up with chili for braver tastebuds. My kids like it mild, so I don’t have chili here, but feel free to add it to taste.

Sweet potato and lentil curry vertical.jpeg

You’ll need:

  • 1 medium sweet potato
  • 1 tablespoon vegetable oil of choice, high heat tolerant (olive oil isn’t recommended)
  • 1 tablespoon ghee or veg oil
  • 1 medium chopped white onion (about ¾ cup if using frozen)
  • 1 cup/1 medium finely chopped or grated carrot (I use a cheese grater)
  • 1 cup/1 medium finely chopped bell pepper (yellow hides really well)
  • 1 cup rinsed red lentils (or yellow, but please rinse well)
  • ½ teaspoon salt
  • ½ teaspoon cardamom powder
  • ½ teaspoon cinnamon powder
  • ½ teaspoon turmeric powder
  • ½ teaspoon garlic powder
  • ½ teaspoon cumin powder
  • ½ teaspoon paprika powder
  • 1 cup roughly chopped coriander/cilantro (fresh is best, but use less if using those little tubes…)
  • 3+ cups of warm water (additional water to top it up as needed to soften lentils)
  • 3 tablespoons Greek yogurt (optional, but adds creaminess)
  • If serving with rice, I use 2 cups jasmine rice, 4 cups water, 1 cup frozen peas, a tab of butter and a dash of Chinese Five Spice.

The method:

Begin with preheating your oven to 400F/200C for the sweet potatoes.

Peel and chop the potato into roughly the same size pieces for even cooking and add to the tray.

Toss the potatoes in a bit of oil and cover with aluminium foil for the first half of the baking time (20-30 minutes).

In a large skillet, add the ghee or oil, onion and carrots, and lightly brown over a medium-high heat for 2-3 minutes.

Measure and rinse your lentils, ensuring the water runs clear through a sieve. Add the lentils and the peppers to the onions and carrots.

Add your dry spices and coriander to the mixture. You can use a premixed dry curry spice if you prefer.

Give it all a good stir to coat the lentils well with your spices, and allow them to lightly fry for about 2 minutes before adding the water to cover the lentils.

Reduce the heat to med/low, cover your skillet with a lid and allow the curry to soften. You want to be sure the lentils are covered, so you may need to top up the water occasionally. This should only take 20 minutes, but it depends on the lentils.

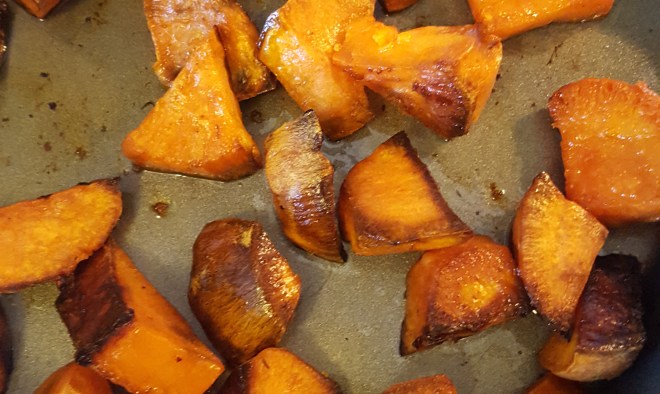
After 20-30 minutes in the oven, remove the aluminium foil from the sweet potatoes and finish uncovered for an additional 15-20 minutes, or until lightly-browned edges show off the natural caramelisation.

Roasting sweet potatoes.jpg

Once the lentils are just about the desired texture, the sweet potatoes should also be done, approximately 45 minutes all in. Remove the potatoes from the oven and add to the curry. The potato pieces will naturally break apart into the curry as you stir them into the mixture.

At this point, I’ve usually started my rice. There’s a lot going on with this dish, but it simmers away without needing attention, so there’s plenty of time to get the rice going in time for serving. The curry will happily bubble away, reducing to your favourite consistency.

The roasted sweet potato thickens the dish, so you can mix it thoroughly or leave larger bits – it’s up to you! If you like the added creaminess, you can also add the Greek yogurt to mellow the spices and sweetness. If adding yogurt, be sure the temperature is reduced and you just bring the curry back to a light bubble before serving.

We enjoy this with just a bit of rice and a nice big ladle full of lentils. My husband and I usually add a dash of chili flake or a spicy chutney, just for the heat. My daughter especially loves this curry, and doesn’t even need rice. I hope you give this a try and enjoy!
 

Sparkly Mummy


Tortilla Soup recipe

Pretty much any restaurant that serves Mexican food serves a version of Tortilla Soup. It’s brothy, fragrant and delicately spiced. Most recipes ask you to have a bit of shredded chicken on hand to pour the broth over when serving. I don’t usually have baked or boiled chicken laying around, unless I have a leftover roast that hasn’t been picked bare, so my recipe includes cooking the chicken in the broth. As per the name, tortillas are usually grilled and sliced to top the soup, but I’ve found a handful or corn or flour tortilla chips add the texture, flavour and namesake without the fuss of grilling my own.

If you haven’t tried Mexican soups, you haven’t truly embraced the winter warmer. This is a simple dish, but the depth of flavour may surprise you. Many recipes for tortilla soup have as little as four spices, keeping a clear broth to pour over shredded chicken. I like to incorporate as many vegetables as possible when cooking for my family, so I load this one up with onion, carrot, white beans and tomato. I also thinly slice chicken breast whilst still slightly frozen, and then boil it in the soup to keep it moist and tender, and add natural chicken flavour to the soup. This allows the chicken to begin to shred after boiling away for just twenty minutes or so. It’s an all in one pot, midweek meal that smells and tastes amazing.

tortilla-soup-in-the-bowl

You’ll need:

  • 1 teaspoon oil of choice
  • 1 cup chopped onion (I use frozen)
  • 1 teaspoon minced garlic (fresh or dried)
  • 1 cup grated carrot
  • 1 8oz tin diced tomato
  • 1 tin 8oz white/cannellini beans
  • 1 teaspoon coarse salt
  • 1 teaspoon paprika
  • 1 teaspoon cumin powder
  • 1 teaspoon oregano flakes
  • 1 teaspoon chili powder (optional depending on kids’ heat threshold)
  • 2-3 boneless, skinless chicken breasts
  • 4-6 cups of water
  • 2 cups chopped coriander/cilantro (fresh is best)
  • Salt and white pepper to taste
  • 1 small bag of corn or flour tortilla chips the break up on top when serving
  • Optional shredded cheese for serving

The method:

It’s easiest to prepare your chicken first, so that you have clean hands for stirring and adding spices. I like to slice chicken breast when it’s slightly frozen, so this dish is perfect for a packet I’ve had out thawing for dinner. Fresh chicken (or no chicken for the vegetarians) is still perfectly wonderful – I just tend to keep small freezer bags with meal-size portions of chicken and minced beef on hand for meal planning. Slice the chicken against the grain in thin strips. I find this works best for the shredding you want to achieve in a short amount of time.

I like to do this in one pot, so I begin with heating the oil, onions and garlic together over a medium high heat in a large soup pot. After a minute or two, the onions should be translucent and the garlic lightly frying.

Add the grated carrot, tomato and salt, and stir into the mixture. Drain and rinse the beans before adding to the pot.

Once the beans are mixed in, add the dry spices and give it a good stir before allowing it to bubble.

Once the tomato and carrots have softened slightly – 5 minutes or so should do the trick – add the chicken slices and just coat with the mixture.

Add the water straight away to avoid frying the chicken, you want the chicken to be submerged to boil.  

Allow the water to come to the boil before adding your chopped coriander.

Once the pot is bubbling nicely, the chicken will go white quickly and the beans will begin to break down. I have been known to add only half of the tin of beans to begin with, and save the second half for later to retain texture, but it’s up to you if you want to add this step.

I allow this soup to boil with the cover on for about 15 minutes before reducing the temperature to a simmer and removing the lid. This helps the chicken to soften and absorb the flavours of the soup.

You can let this simmer for ages, but it’ll be ready after 30 minutes if you’re hungry – even sooner if you just make the broth and pour it over leftover chicken or no chicken at all.

To serve, my kids like this ladled over rice, with a few corn chips broken on top. I love a big, steamy bowl as it is, a couple of corn chips and a small handful of shredded cheese on top. My husband just wants a bowl of soup with a few drops of hot sauce and he’s happy. However you take it, this is a family favourite that offers a Mexican flare and isn’t heavy with refried beans and cheese. It’s veggie packed, bursting with flavour and aroma, and is sure to make your family think you slaved for hours to get such succulent chicken. Buen apetito!

tortilla-soup-in-the-pan-2

Sparkly Mummy
A Mum Track Mind

One-pot tuna pasta recipe

I’m all about the quick, 20-minute meal to feed the hungry crowd, and this version of classic tuna pasta is dead easy. I really like the sweetness added by frying off a few onions in butter before adding the tuna. Usually, tinned tuna is simply stirred into the dish, but I fry it a bit with the onions as I break up the meat, and it just adds a depth of flavour without being labour intensive.

You can use gluten-free pasta if you prefer – any shape will do – but I like standard macaroni for this dish. I know it’s tempting to use a tin of condensed cream of mushroom or chicken soup, but I promise this is just as easy and less gloppy. I only want one pot to clean, so I boil the pasta and peas together, make the sauce while they drain, and then toss it all together again. Easy peasy.

tuna-pasta-in-the-bowl

You’ll need:

  • 2 cups dry pasta
  • 1 cup frozen peas
  • 4-6 cups water

For the sauce:

  • 1 cup chopped white onion (I use frozen)
  • 2 TB butter
  • 1 tin of tuna
  • 1 tsp dried garlic
  • ½ tsp dried oregano
  • 1 cup single cream or half and half
  • 1 cup shredded cheese of choice (I use mild cheddar for the kids)
  • Salt and pepper to taste
  • Optional splash of milk to loosen the sauce as preferred

The Method:

Bring a pot of water to the boil and add your pasta. Adjust the quantities for a larger pot, but this should easily feed a family of four to five people.

After half the cooking time for your pasta, add the frozen peas and bring back to the boil.

Once the pasta is tender, drain the pasta and peas and allow to rest while you use the pot.

pasta-and-peas

Add butter and onions over a med-high heat and allow the onions to go translucent.

Add the tinned tuna and break it up, coating it with the butter and onions, and allow the mixture to fry slightly.

Add the dried garlic and oregano, and mix well before pouring in the cream. Stir well, continuing to break up the tuna and allowing the cream to warm.

Add the cheese a bit at a time, stirring well into the creamy tuna in about three batches. Feel free to add more cheese than stated if you love it!

tuna-pasta-sauce-with-cheese

Allow the sauce to begin to bubble slightly before returning the pasta and peas. Mix well and give it a taste to add salt and pepper as you see fit.

This couldn’t be faster for a midweek meal; most ingredients are staples! Hope you enjoy this no-fuss version of a classic tuna pasta. If you just can’t live without the cheesy-baked top, go ahead and throw it into a baking dish and cover with shredded cheese. I didn’t have the time to oven bake, and this was on the table in 20 minutes! It left me time to play some Uno with the kids.

Sparkly Mummy

Layered enchilada casserole recipe

I grew up in Los Angeles, and Mexican and Latin foods are comfort foods for me. For over a decade, I lived in the UK, outside of London (where there would have been wider choice of ingredients), and I struggled to find the ingredients for most of my favourite dishes. I even imported things like roasted, diced chillies, and chipotle spice via home visits or care packages from my mum. These days, however, even a local Tesco has a good chance of having most of the ingredients for this recipe – the times, they are a’changing.

I am a big fan of enchiladas. They’re especially nice for my husband’s wheat/gluten allergy, as they’re a corn tortilla dish instead of flour. The enchilada sauce (basically watery chili powder) can be bought in a tin or jar, and it saves a step and a pan. You can buy enchilada packs in the supermarket, and it should have corn tortillas and the red enchilada sauce. If you prefer to use Quorn over beef, it’s also vegetarian, and you can also substitute refried beans for meat for the same result.

Most of the time, if you order an enchilada plate in a restaurant, it’s dripping with cheese and sauce, and can be a little overwhelming. This recipe misses none of the flavour, but includes the all-important hidden veg and goes a little easier on the cheese. Casserole presentation allows for several more servings in the baking dish, and is so much easier to put together than trying to roll up each enchilada. I even let the kids help me layering the tortillas, meat, cheese and sauce in assembly line fashion. It’s delicious fun, topped off with a bit of soured cream and salsa or a side salad – the whole family will be coming back for more.

Plated enchilada vertical.jpg

You’ll need:

  • 1 cup chopped white onion (I use frozen)
  • 1 tsp veg oil of choice
  • ½ tsp ground cumin
  • ½ tsp ground coriander
  • 1 tsp fresh or dried garlic minced
  • ½ tsp smoked paprika
  • ½ tsp chipotle pepper powder
  • 1lb lean minced beef
  • ½ cup shredded carrot
  • 1 cup chopped coriander/cilantro (frozen or fresh)
  • I packet of small corn tortillas (approximately 10-15 used)
  • 1 8oz jar or tin of enchilada sauce (if you can’t find ready-made, it’s pretty easy to make)
  • 3-4 cups shredded mild cheese (Double Gloucestershire and Red Leicester are lovely for this)

The method:

To begin, I add the onions and dry spices to a hot pan with a bit of oil. Once the onions are coated, I add the beef and mix it all together in the pan.

Fry off the mixture, browning the beef and onions together. This will keep the spices from burning and allows the meat to absorb all of those flavours.

Enchilada casserole ingredients

Once the beef is mostly browned, add the carrots and coriander with about 1/3 cup of water and reduce heat to simmer.

While the beef simmers and reduces, you can begin to layer the casserole in a baking tray.

Add a couple of tablespoons of the sauce to the bottom of the baking dish before adding a layer of tortillas. I usually cut some of the tortillas in half to fit nicely against the sides.

Add a layer of shredded cheese onto the tortillas, and then a layer of meat, before covering with another layer of tortillas. Top the tortillas with another couple tablespoons of the sauce before the cheese the next time to wet them.

kids helping assemble enchilada casserole

Repeat once or twice, depending the depth of your baking dish. The last layer should be just sauce and cheese, for a nice crispy, gooey cheese top.

Bake uncovered at 180C/350F in the top 1/3 of the oven for approximately 20-25 minutes, or until the top is golden. Allow to rest for 5 minutes or more to cool before serving.

enchilada-casserole-in-the-oven

I usually add a dollop of soured cream and some hot sauce to mine, but the kids like it just the way it is!

Sparkly Mummy
Link up your recipe of the week

Midweek Moussaka recipe

Autumn is a great time to try harvest foods like aubergine and make casserole bakes that warm the house. Greek food is something I rarely make at home, preferring to indulge at a restaurant or friend’s home, but this moussaka recipe is hard to resist. Moussaka is a bit like Greek lasagne: usually layered, meaty and loaded with cheese. The béchamel sauce may be daunting, but I’ve made this recipe a mid-week version that will hopefully calm your aversion. Something magical happens in the oven when the sauce thickens and browns across the top – it’s absolutely worth a try.

My family enjoy this dinner so much. I don’t think there’s anything better than sweet and savoury to get kids interested. The meat is browned with cinnamon and balsamic vinegar, and the béchamel is creamy with milk and parmesan cheese. The aubergine, or eggplant, is lightly fried in olive oil, but I use cubes rather than taking the time to thinly slice for layering. The final product is worth every ounce of effort, and I guarantee this moussaka recipe takes less than most. Even if you think you don’t like aubergine, I think you’ll be surprised at how flavourful, hearty and delicate this dish really is.

Midweek Moussaka Recipe

You’ll need:

  • 2-3 aubergines/eggplants peeled and cubed
  • 2-4 TB olive oil
  • 1 lb minced beef (the leaner the better so you don’t have to drain)
  • 1 cup chopped white onion
  • ½ tsp cinnamon
  • ½ tsp nutmeg
  • 1 tsp garlic granules
  • 1 tsp dried oregano
  • 1 tsp dried parsley
  • 1 tsp salt
  • 1 tsp black pepper
  • 1 8oz tin of tomato sauce
  • ¼ cup balsamic vinegar
  • 4 cups warm milk
  • ½ cup salted butter
  • 6 TB all-purpose flour (not self-rising)
  • 1 egg beaten
  • 1-2 cups grated parmesan cheese

The method:

To begin, peel the aubergines and cube them into 3 cm/1 inch cubes. Some say you should salt the aubergine to absorb water … I usually can’t be bothered, but give it a try if your eggplant seems particularly wet.

cooking-the-aubergines

In a large pan, warm a tablespoon or two of olive oil before adding about half of the aubergine cubes. Be sure to leave space between pieces and fry off in two or three batches. Allow the slightly golden-edged aubergine to rest on kitchen roll while you finish batches and the meat.

Once you’ve spent ten minutes or so lightly frying the cubes, you can reuse the pan for the beef.

Add the chopped onion, minced beef and dry spices to the pan with what remains of the oil and any aubergine bits.

Cooking mince for moussaka.jpg

Allow the meat to brown nicely before adding the tomato sauce and balsamic vinegar. Bring to the boil before reducing the heat to a simmer for about 15 minutes. Now is a good time to preheat the oven to 180C/350F.

While the meat simmers and reduces, it’s time for the béchamel sauce.

I begin with using a microwave-safe measuring cup or bowl to warm the milk. Microwaving 3-5 minutes on high should do the trick, but you want to be sure the milk is nearly boiling.

In a non-stick pan, melt the butter and add the flour. I use gluten free, and may use a bit less than stated above, but the roux you create will be thick. Mix well with a rubber spatula until smooth.

Gradually add the hot milk, stirring quickly to smooth into the roux. This sounds intimidating, but it’s really going to come through for you.

Once the milk is fully incorporated into the butter and flour, allow it to lightly boil over a low heat and thicken slightly. Remove from the heat and mix in ½ cup of the parmesan.

Cooking bechamel and tomato sauce for moussaka.jpg

Now for the assembly: pour the partially-fried aubergine cubes into the bottom of a large baking dish. Sprinkle about ½ cup of the parmesan cheese over the top of the cubes.

Moussaka ready to bake.jpgPour the meat mixture over the aubergine and add another layer of parmesan sprinkle before pouring the beaten egg over the top.
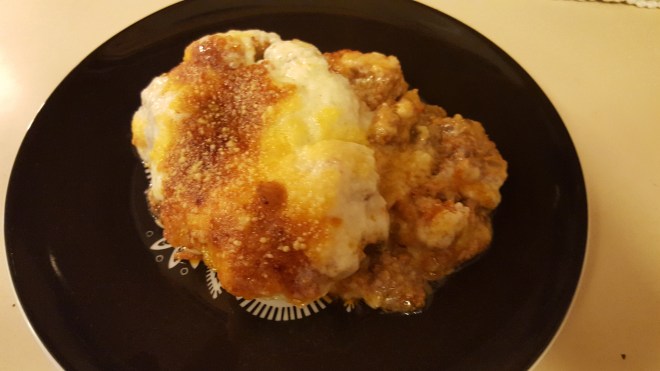
Pour the slightly cooled béchamel sauce over the top and give it a little wiggle to settle the casserole before popping it in the oven.

Bake at 180C/350F for 45 minutes to an hour, or until the top is golden and solid. Allow the dish to cool before serving to preserve the layers, or dish up straight away if you’re not fussed about presentation.

Enjoy!

plated-moussaka

Sparkly Mummy

Easy gluten-free macaroni & cheese recipe

My kids were born in Surrey, and they never learned about Kraft macaroni and cheese. I know there are a lot of families out there that rely heavily on the cupboard staple that is pasta and powdered cheese mix, and I’m not judging. But between a gluten-free husband and processed-food hating children, I’ve found myself making mac-n-cheese from scratch many times. I used to think cheese sauces were terrifying, but this method skips making a roux with butter and flour, and is nearly fail proof.

The whole dish is really quite easy, and can even be a one-pot wonder if you can wait for the pasta to finish and reuse the pot. I go all out (thank goodness for dishwashers) and use one for the pasta, one for the sauce and a baking dish to finish it off. This baking bit is especially nice for partially boiled gluten-free pasta, but is easily skipped if you fully cook standard flour macaroni or shells.

This takes about the same amount of time as the boxed version, I promise, and is a million times tastier. Skip the processed cheese and have a go at making amazing cheese sauce to smother your pasta of choice.

Easy gluten-free macaroni & cheese recipe

You’ll need:

  • 8 or 10oz dry gluten-free pasta shells or macaroni (I used a corn and quinoa mix shell)
  • Approximately 6 cups of water for the pasta
  • 1 cup of chicken or vegetable stock
  • 2-3 cups shredded cheese of choice (mature cheddar is especially nice)
  • 1 tablespoon butter
  • 1 cup single cream (or half-n-half if you’re in the US)
  • 1 heaped TB soured cream or crème fraiche
  • Salt and pepper to taste

The method:

My super speedy method is to begin with getting the water boiling for the pasta in a medium-sized sauce pan. Use the kettle for at least 6 cups of water if you prefer.

In a second small saucepan, bring the chicken or veg stock to a boil. I generally use stock concentrate and kettle water, so about ¼ teaspoon of concentrate to one cup of water.

Add the shredded cheese (I’m super lazy and buy pre-shredded) one handful/cup at a time and stir well into the stock over a medium-low heat. I usually use a non-stick pan and rubber spatula for this job, rather than risk the cheese and cream sticking to the bottom.

Pour in the cream once the stock and cheese are well blended and beginning to reduce, keep stirring.

Once the pasta water has come to a boil, toss the pasta in with a bit of salt and reduce the temperature.

Add the crème fraiche or soured cream to both thicken and temper the flavours of the stock and cheese. Blend well until the mixture is smooth and slightly sluggish to run off the spoon.

Have a taste and add pepper and salt as you please. Also extremely tasty: a light dash of paprika or oregano, if you’re feeling fancy.

The pasta should be cooked by now, so take the sauce off the heat while you drain and rinse the shells or macaroni.

If you were going for the one-pot method, you’d simply rinse the pot and begin on the sauce while the pasta drains, but I do suggest a little sprinkle of oil to keep the pasta from getting too stuck together.

If you’re going all out, drain the pasta whilst it’s al dente and pour it into a baking dish. Again, I go non-stick so I don’t lose any shells to the pan. Finishing the pasta in the sauce makes gluten-free pasta especially tasty, soaking up the flavour.

Pour your creamy gorgeous sauce all over the pasta and give it a good stir to coat every noodle.

You can add the pasta back into the sauce if you’ve been draining for the one-pot method, stir to coat well and add salt and pepper to taste. It’s ready to serve once the pasta is back to temperature. Enjoy!

Bake the pasta with sauce in the oven at 350F/180C for 15-20 minutes, or until you’re too hungry to wait any longer. Feel free to top off the pasta with more shredded cheese if you’re indulgent and like the layer of crisped cheese on top. My son isn’t a fan, so I leave it off.

My kids absolutely gobble this up, and it’s done within 45 minutes with the oven method, 25-20 with stove top only. There’s plenty of protein and calcium, without needing meat, and using gluten-free pasta, we end up with hidden veg! If you like, throw in some frozen peas if you’re doing the oven method, they’ll be cooked and add a bit of sweetness. You can try vegetable pastas too, and different cheeses for more intense flavours … make it your own! I’ve used this cheese sauce over vegetables as well, if you’re not interested in pasta, and it’s lovely. Hope you have fun and enjoy!

Macaroni and cheese ready to serve

Sparkly Mummy

Caramelised Onion and Mushroom Stew with Pumpkin Pie Pudding recipe

Autumn has entered full steam, and with all the blustering leaves and windy rains outside, I like to fill the home with warm smells and full bellies. When I have a hankering for French onion soup, but I know I need to feed the kids, I go for this all in one stew that can be made with what I have on hand. You can easily caramelise the onions and mushrooms and then use them as a burger topper, base for a bolognese, marinade for chicken or just a chutney for sandwiches. Yesterday, I wanted to add some rump steak and baby potatoes I had on hand, rather than just adding beef stock to the sweet onions and mushrooms to make soup. The result was a sweet, savoury blend of creamy, tender potatoes and beef.

This is a one pot version that can be done with cubed chicken breast and broccoli with chicken stock in place of the beef, potato and beef stock for this recipe and it’s divine. As I mentioned, the caramelised onions can be used in any number of ways if you want to stop there: allow them to cool and store for up to two weeks in a sealed container in the fridge.

The pumpkin pudding is a crustless version that’s gluten free and baked in ramekins. It’s a five minute mix and into the oven; one of the easiest desserts ever. This time of year, I like to decorate the little pies with dark chocolate chips to make jack-o-lantern faces for the kids.

You’ll need:

  • 2 medium onions (I use one red and onion white)
  • 1 TB vegetable oil of choice
  • 1 TB salted butter
  • 1-2 TB balsamic vinegar
  • 1-2 cups sliced white mushrooms
  • 1 lb cubed beef
  • 10-12 Maris Piper/baby potatoes (I had some leftover from Sunday roast)
  • 1 tsp beef stock concentrate
  • 1 tsp dried oregano
  • 1 tsp dried garlic
  • 1 tsp dried thyme
  • 1-2 cups water
  • 1 cup single cream or half and half
  • Salt and pepper to taste
  • 1 tin 425g pumpkin puree (available from American sections in larger supermarkets, or you can puree your own pumpkin)
  • 1 tin 396g sweetened condensed milk
  • 2 eggs
  • 1 heaped tsp pumpkin pie spice (nutmeg, clove, cinnamon, salt)

The method:

Begin with slicing the onion into long strips and adding them with the oil to a wide pot over a medium heat. The onions will sweat and begin to brown after a few minutes of little stirring. Once they begin to brown slightly, try to stir more often so they don’t fry instead of sweetening.Chopped onion.jpg

After 10 to 15 minutes, you should begin to see them all browning, shrivelling and producing a lovely sweet aroma. You won’t need to add any sugar, these release their own natural sweetness that’s impressive.

Once the onions have produced a nice glaze, add the mushrooms and coat them with it. Add in the balsamic vinegar and tab of butter. Keep stirring until the mushrooms and onions are well blended.  onions-and-mushooms-cooking-down

The mushrooms stay nice and firm with this treatment, and make an excellent base for bolognese, marinade for creamy chicken, so a lovely burger topper if you stop here. I don’t blame you if the smells drive you to using this right now.

To finish the stew, add cubed beef and coat with the onion and mushroom mixture before allowing to sit and lightly brown. Depending on the quality of beef, I may reduce the temperature significantly at this point and add more water with the beef stock to tenderise.onion-mushroom-stew-ingredients-raw

Before the meat cooks through, add the beef stock, warm water to cover the meat and dry spices.

Next, add the potatoes to the watery pot. I used already cooked Maris Pipers I had on hand, but you can use raw potato if you quarter them and they cook quickly.  If you don’t want to fuss with chopping, you can add more water to accommodate the time to cook them through, no problem.  Allow the cooked potatoes to boil for at least fifteen minutes to warm through.

Allow the water to reduce by half, exposing the beef and potatoes, before adding the cream. Reduce the heat to avoid scorching, but allow the stew to bubble a bit before giving it a taste. Add salt and pepper to taste.

This shouldn’t take more than an hour from start to finish, with a prolonged simmer in the middle. I love meals that allow me to run after toddlers, maybe even get their bath in while it’s bubbling.  This was served with a dollop of soured cream, my daughter’s favourite.

finished-onion-mushroom-stew

For the pumpkin pudding, preheat the oven to 350F/180C and pull out a medium sized mixing bowl.

Add the pumpkin puree, condensed milk, eggs and dry spice, and whisk together until smooth. I usually use a rubber spatula or fork, but you can use a hand mixer for about a minute if you prefer.

Ladle or spoon the mixture into 6-8 ramekins, about ¾ full. No preparation/grease required.

Bake the pumpkin custard for 20-25 minutes, or until it begins to come away from the edges.

Remove the ramekins from the oven and allow to cool. If you’d like to decorate, use a handful of chocolate chips to fashion a jack-o-lantern while they’re still slightly warm. You can even let the kids help with this super easy dessert!

Pumpkin puddings vertical.jpg

Sparkly Mummy

Warming Beef Stroganoff Stew recipe

This is a recipe that I love to make if I’m craving soft, tender beef and a warm bowl of dinner. I like one pot, one utensil meals. Am I lazy? You bet.

My family are homebodies. I love an afternoon indoors with the children playing and a pot of stew stewing. I found some lovely beef steaks the other day on sale in my local grocery. I had thought of surprising my husband with a grilled steak dinner, but a rain and wind storm threw that plan right out of the window. Instead, I decided to stew up the beef with potatoes, carrots, peas and mushrooms. It’s the kind of stew that can be done midweek; if you only have an hour before dinner and can manage fifteen minutes to get it started, you’ll easily be able to walk away from it until you plate up.

If you’re not a fan of soured cream or crème fraiche to stroganoff the stew, you’ll still have a hearty, flavourful soup, but I think the creaminess and light tang accompany the potatoes perfectly. Traditionally, you’ll find pasta in a stroganoff recipe, but this is my one-pot, gluten-free, family-friendly version.

Warming beef stroganoff stew recipe

You’ll need:

  • 1-1.5lb beef steak (approximately two medium-sized steaks) cubed
  • 1 tsp veg or olive oil
  • 1 tsp garlic granules or fresh crushed garlic
  • 1 tsp dried oregano
  • 1 tsp dried thyme
  • 1 tsp beef stock concentrate
  • 1 cup chopped onion (I use frozen)
  • 1 cup chopped/julienned carrot (approximately one medium carrot)
  • 1 cup chopped mushrooms of choice (I finely chop so they disappear and the kids don’t know)
  • 1 cup petit peas (I use frozen)
  • 15-20 baby potatoes (small Maris Pipers)
  • 4 cups of water
  • ½ cup (or more to taste) soured cream or crème fraiche
  • Salt and pepper to taste

The method:

Using a nice deep pot over a medium-high heat, add the cubed beef, oil and dry spices. Coat the beef with the spices with a quick toss in the pot, and then allow the beef to brown deeply on at least two sides. If the bottom of the pot starts to stick a bit, don’t worry, that’s flavour that will come up with the water.

Once the beef is browned, but not cooked through, add the beef stock concentrate and a splash of water to dissolve. I do this right in the pot and add just enough water to allow me to loosen the concentrate.

Add the onion, carrots and mushroom to the beef and stock mixture and allow the onions to just go translucent; you don’t want the beef to cook completely.

Add the potatoes and peas, then cover with water.  Bring the water to the boil and then reduce the heat to medium-low, just enough to maintain a simmer. You can walk away from this for up to 45 minutes, checking occasionally to be sure it’s not sticking to the bottom or needs a top-up of water. I don’t bother peeling my potatoes, and only halve the largest, so I like to give this a while to bubble. If you are pressed for time, you can peel and cube the potatoes and halve the cooking time, but be careful they don’t turn to mash.

Slightly less close up of stew.jpg

Once the potatoes are soft and the broth has reduced by about half, add the soured cream/crème fraiche and turn off the heat. I probably use a little more than ½ cup, but my family all love soured cream on potatoes. The beef is so tender by now, it won’t even need a knife. I’ve shown the kids plate version and my warmer bowl of succulent stroganoff stew to tempt you. This is a simple recipe that absolutely oozes flavor, give it a go!

Sparkly Mummy

Potatoes ‘Bravas’ with chicken recipe

My husband is Portuguese South-African, and I’ve grown to love paprika in an unusual way. Chorizo is something special; if you’ve never tried cooking with this sausage, I encourage you to try this recipe and discover the joy. I try to find a good quality, hard chorizo, simply because most ‘cooking’ chorizo is incredibly fatty. If you can’t find any, don’t worry, the recipe calls for it optionally for depth of flavour.

potatoes-bravas-pinterest

This is a take on the Spanish patatas bravas: crispy cubed potatoes heavily spiced and fried. I try to keep midweek meals to one pot, and this is a good one if you add chicken strips/chunks to the pan. My kids are big fans of sweetcorn, so I always keep a tin on hand. With this dish, it adds a crunchy sweet freshness that curbs some of the spice. I usually drain the corn, but keep it room temperature and sprinkle on like a sort of veggie crouton.

If I don’t have a lot of time to stand at the stove, this is also a fabulous tray bake for about 40 minutes in a 180C/375F oven. I try not to use too much oil and salt, but you can use your judgement and taste buds for this quick, flavourful meal. It usually only takes twenty minutes to cook, if the potatoes are in small cubes, and it’s something I fall back on if I’m short on ingredients. Most are staples I have on hand, and it takes very little prep.

chopping potatoesYou’ll need:

  • 1 or 2 white potatoes, peeled and cubed
  • 1/3 cup chopped red or white onion
  • 1/3 cup roughly cubed chorizo sausage (optional)
  • 2 tsp veg oil of choice
  • 1 or 2 chicken breasts sliced into strips
  • 1 tsp garlic granules
  • ½ tsp paprika
  • ½ tsp cumin
  • ½ tsp oregano
  • 1 tsp salt (to taste)
  • 2 TB chopped tomato
  • Approximately 1 cup sweet corn

The method:

If you’re lucky enough to have found a lovely chorizo, start with slicing and quartering about a 1/3 of a cup and add it to the warming pan. I use a cast iron pan, but you can also use a wide-based pan that’s good for browning.  I keep the temperature around a medium-high while the chorizo warms and begins to run paprika juices – it smells amazing!

Add the onion and potato to the oil produced and stir until they are coated with the colourful paprika oil from the chorizo. Then add the veg oil and dry spices, coating the potatoes evenly before leaving them to brown.

spices and potatoes in the frying pan

If you aren’t using chorizo, add the oil, potatoes and onions all together with the dry spices and give it a good mix before leaving to fry over a medium high heat.

Stir infrequently to allow colour to form on all sides of the potatoes. If the spices begin to stick to the bottom, rather than adding more oil, try adding a splash of water from the kettle and gently scraping the bottom of the pan with a spatula. This will also help soften the potatoes in the steam produced.

While the potatoes are softening, I slice up the chicken into small, even strips that will cook quickly. If you’re going for the tray bake, try to keep the chicken pieces a little larger so you can put everything in at the same time and they won’t be overdone.

Add the chicken to the potatoes before your next scheduled stir, and toss everything together to coat the chicken with the contents of the pot. Again, refrain from too much stirring so you’re sure to get good colour on most sides of the potato cubes and chicken.

raw chicken added to potatoes
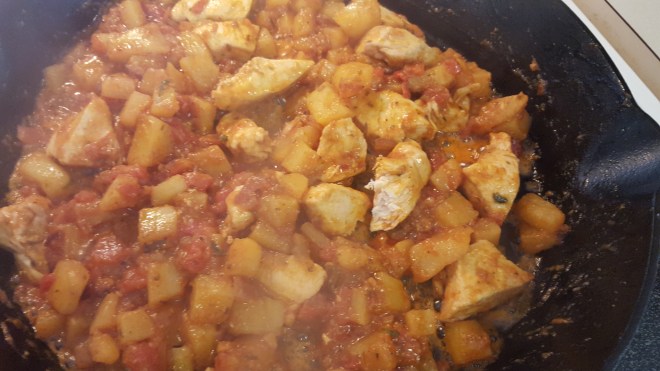
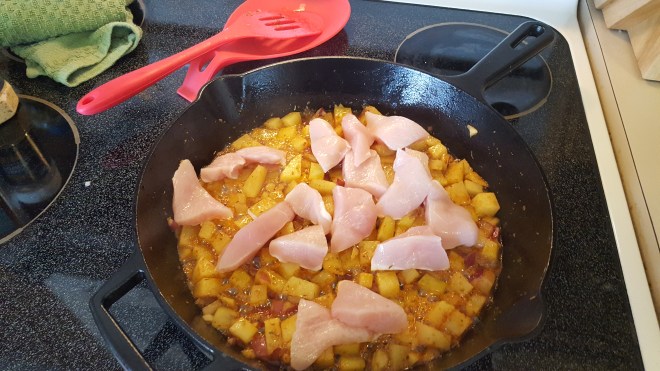
Add the chopped tomato and give it another good mix-in. The chicken should be cooked after 10-15 minutes, and the tomato adds a bit of tenderising acidity.

You should be able to break a piece of chicken apart easily with your spoon, and the same again with a potato cube, after 20-25 minutes.  Drain your sweet corn, or slice from a fresh cob if it’s the right season.

Potatoes bravas in the pan

Plate up with a sprinkle of corn over the bravas, and enjoy! My kids don’t even ask for ketchup with this, because the tomato and spices in the dish keep it moist. The chicken stays tender and flavourful for the quick cooking, and I’m in and out of the kitchen in no time.  If I’m really pressed for time, I toss everything together into an oven tray and check on it for a stir every 15 minutes until it’s done. Either way, it’s a winner, winner chicken dinner in my house!

dinner-plates-with-food

Sparkly Mummy

Recipe for Albondigas (Mexican Soup)

This is a recipe that’s been handed down in my family and adapted for family life. My grandfather, the chef of the house, would take the time to make meatballs, as the standard Albondigas is a meatball soup, but over the years I’ve fallen out of using that method. It is a different experience to have moist meatballs with broth, but this recipe maintains all the flavour without all of the fuss.

This recipe is my version of a traditional family chicken soup: perfect for a cold! It’s also a celebration soup; it’s on the back burner at most family gatherings or parties, ready for anyone to scoop up a bowl with a few corn chips and some guacamole on top. It’s truly a delicious, healthy dish that emits amazing aromas all day.

I serve this soup over rice for my kids, draining a fair bit of broth, but loading meat and veg onto the top. They love guacamole, and the promise of a few corn chips for dipping. My son especially likes shredded cheese on top, and my daughter likes soured cream. My husband and I prefer a nice deep bowl with a handful of corn chips crushed on top, a handful of shredded cheese and dollop of guac. The cheese gets gooey and gorgeous, and the corn chips soften, adding an almost enchilada flavour that’s divine.

This post includes my coveted guacamole recipe as well, so make sure you have a couple of ripe avocados on hand (or more), and a bag of salted corn chips for dipping. You can make this soup as thick or as brothy as you like, and it gets better as it simmers. It freezes well, if you make a big batch, and can be stored for quick dinners another day. If you’re only making this for a grown-up crowd, add plenty of chilli to kick up the heat – it won’t disappoint.

Mexican albondigas soup.jpg

You’ll need:

  • 1 tsp vegetable oil
  • 1-1.5lb ground/minced beef
  • 1 TB minced garlic
  • 1 cup chopped white onion (I use frozen)
  • 1 tsp ground cumin
  • 1 tsp smoked paprika
  • 1 tsp dry oregano
  • ½ tsp (or more) chilli powder or chilli flake (optional)
  • 1 tsp or 1 cube beef stock concentrate
  • 1 cup shredded/grated carrot (about one medium carrot)
  • 1 can chic peas/garbanzo beans drained and rinsed
  • 1 can chopped tomato (optional, but don’t use crushed – you want chunks of tomato)
  • 1-2 cups topped, tailed and halved green beans (I use frozen in a pinch)
  • 1-2 cups chopped coriander/cilantro with stalks (usually one good sized bunch)
  • ½-1 cup chopped red pepper
  • 2 med ripe avocados
  • 1 tablespoon lime juice
  • 1 teaspoon (or more) garlic powder or fresh garlic
  • ½ teaspoon cumin or smoked paprika or both
  • Salt to taste
  • Corn chips, rice or tortillas for dipping (optional)

The method:

This recipe begins, like all great dishes, with garlic, onion and beef mingling in the pot, browning together with a bit of oil. The best method is stirring infrequently, allowing the beef to brown while the onions soften. I’m usually a “full-wack” cook, so I start out on a high heat and break up the beef with a wooden spoon.

After a couple of minutes, there should be a liquid forming from the beef and onion. Add your dry spices and mix into the beef as you continue to break the beef into small pieces for browning. Once it’s pretty well broken up, leave it sit on that high heat to give great colour and flavour. Don’t worry if the spices start to stick a little to the bottom, it’s all flavour that will come off with the addition of water.

Once your dry spices are in and the beef is browned nicely, add the beef stock concentrate and a splash of water, and mix in the beef.

Add drained, rinsed chick peas, shredded carrot, red peppers and tomato. I usually chop as I’m cooking, so the chick peas and tomato are easy to throw in first, then chopped carrots and peppers once they’re finished. If these go in after the water, it’s not going to change the flavour.

Add enough water to thoroughly cover the mixture and bring to a boil. I usually add the water after the chick peas and tomato have had a chance to fry off a bit. If the mixture is getting too dry, reduce the heat or add a splash of water at any time.

Add chopped coriander, reduce heat to med-low and allow to lightly boil for at least twenty minutes. This soup can simmer away for hours, but it’ll be ready in thirty minutes if you keep the lid on. Be sure to save some of the coriander leaf for your guacamole.

This may sound odd, but a dollop of fresh guacamole is delicious with this soup. If you’ve never added a cool topping to stew, you’re missing out. I love guacamole, and keep it pretty simple to let the avocado speak for itself, but some swear by adding a little Greek yogurt or soured cream and salsa to theirs, and it’s still delicious. This is my method, and I only add yogurt or soured cream if the avocado isn’t quite ripe, because it adds creaminess.

Mash 2 medium avocados in a bowl with a fork with lime juice, dry or fresh garlic and cumin and/or smoked paprika. Once the avocado is mostly smooth, add salt and give it a taste. You may find another sprinkle of any of these flavours as needed to taste, but try not to overdo it and mask the avocado. Sparingly add more lime juice, because it can overpower with citrus.

homemade guacamole

I rip up a small handful of coriander leaves left from the soup, avoiding stalks for this fresh side dish, and mix the leaves into the guacamole for a final smashy stir. I like my guac with bits of avocado, but you can smash until it’s completely smooth if you prefer. Best to taste test with a corn chip so you don’t go overboard with the salt.

If you’re feeding a crowd, amp up the quantities and I guarantee the guacamole will be gone by the end of the night. I usually put a tower of bowls, pile of spoons, a bowl of shredded cheese with the chips and guacamole beside the pot of soup at a party and let folks serve themselves. My kids will happily eat the soup over rice (drain the broth a bit), and my son likes smashing the chick peas in his bowl. It’s another fabulous, veggie-packed meal they scoff without hesitation. And if you’re sick of chicken soup, give this one a go … it’s sure to clear your head!

Mummy in a Tutu
Design a site like this with WordPress.com
Get started