Easy Pesto Pasta recipe

When I was growing up, my dad was in charge of dinner once in a while, and his go-to was pesto. I have a special place on my palate for this style of pesto, and when I have a bit of fresh basil to use, I make a batch of pesto to keep in the fridge. I use the pesto in my spag bol, or as a spread on a cold chicken sandwich, but most especially for the fastest midweek dinner.

The pesto I make has walnuts, which may turn off a few due to taste or allergy, but you can substitute a nice hard, Italian cheese for the nuts if you prefer. Pine nuts are more traditional, but I find them expensive and less versatile than the walnuts, which also find their way into baked goods in my house. You can also add more olive oil than the recipe calls for to taste, but I usually add olive oil to the dish I’m using the pesto to flavour, so I use just enough to blend and preserve.

If you don’t fancy making the pesto from scratch, you can always tear in basil leaves and crush fresh garlic for the pasta recipe, and it’s still flavorful and quick. My kids aren’t the biggest fans of this pasta if it isn’t angel hair and the garlic is overpowering, but they never notice when it’s in the spag bol!  This dish takes all of 15 minutes, the longest step really is waiting for the water to boil. You can even make the pesto in the food processor while you wait for the water and then pasta. So quick, and so tasty!

You’ll need:

Pesto (food processor to a paste)

  • 1 cup fresh basil leaves, rinsed
  • 2 teaspoons (or two cloves) fresh peeled garlic
  • ½ cup olive oil
  • ¼ cup walnut halves or pieces
  • 1 teaspoon salt

Pasta

  • Angel Hair pasta (or spaghetti) to serve four (one handful usually does the trick)
  • ½ cup chopped onion (I use frozen)
  • 1 teaspoon olive oil
  • 1 cup sweet peas (again, frozen)
  • ½ cup rough chopped walnuts
  • 1-2 tablespoons pesto from above batch (or a handful of basil leaves and a bit of garlic)
  • ½ cup shredded Parmesan or preferred hard cheese
  • Salt and pepper to taste

The method:

Using a food processor, blend the basil leaves, garlic cloves and olive oil until smooth.

Add the walnuts and salt, and any more olive oil to keep the mixture smooth up to an additional tablespoon. The pesto paste should not clump up, but remain semi-liquid.

Pesto.jpg

Using a medium saucepan, bring 6+ cups of water to a boil for the pasta.

Break the pasta in half and add to the boiling water. Add salt and oil if you choose, but I usually don’t bother.

While the pasta cooks, scrape the pesto into an airtight container; this will keep in the fridge for a couple of weeks!

Drain the pasta in the sink and return the pan to the cook top with a medium heat.

Add the onions, peas and oil and thaw/lightly fry the onions and peas.

Add the pesto you’ve created and the additional walnut pieces and stir into the onions and peas. This allows the garlic to fry off lightly before adding the pasta.

Return the pasta to the pan and toss lightly. You can also pour the pasta and sauce into a large serving bowl for tossing, it may provide more space for evenly coating the pesto.

Remove from the heat and either in the pot or bowl, add the cheese and toss again.

Salt and pepper to taste before serving. Enjoy!

Plated pesto pasta.jpg

Creamy mushroom & green bean pork steaks recipe

It’s hard to get kids to eat more mature meals – grown-up dinners that appeal to the adults – so I wasn’t sure how to serve my children some gorgeous pork loin steaks that were making my mouth water. I decided to go for a tried and true recipe I grew up with, pork chops with cream of mushroom soup. Of course, not content to just dump the contents of the tin onto some fried chops, I created this recipe, which went down a treat. Using my cast iron pans makes colouring the meat really easily, but if you don’t have one, just leave the meat alone for several minutes to sear the colour onto it in any deep frying pan. I was really surprised at how keen the kids were once the chops were in bite-sized pieces and swirled into the mash.

You can choose to make your mash anyway that suits, but this recipe offers a microwave shortcut that shaves time and clean up in half. Peeling the skins once the whole potatoes have been cooked is much easier, and you don’t have to worry about a pot adding to the steam in your kitchen in the summer.

I used a teaspoon of bacon fat I had saved in my fridge to fry off the steaks, but a bit of veg oil will do the trick if you don’t have lard on hand. I happened to have it after a bacon-heavy brunch, but I must admit it adds a lovely depth of flavor to the pork and onions. You can keep it basic, or add more of your own flare to this dish, so I hope you’ll find inspiration in this ramped-up old standard that takes less than 30 minutes.

Creamy mushroom & green bean pork steaks recipe

You’ll need:

  • 4–6 pork loin steaks or pork chops (depending on the thickness of the steak)
  • 2–3 tablespoons Worcestershire sauce
  • 1 tablespoon garlic granules/powder
  • 1 teaspoon bacon fat or veg oil
  • 1 cup chopped white onion (I use frozen)
  • 2 cups chopped green beans (again, frozen is so easy)
  • 1 cup water
  • 1 8oz (small) tin cream of mushroom soup
  • 1 tablespoon dried oregano
  • 1 teaspoon dried tarragon (optional)
  • ¼ cup single cream or half & half (optional)
  • 4 large baking potatoes
  • 2 tablespoons salted butter
  • ½–1 cup milk
  • Salt and pepper to taste

The method:

At least one hour prior, but preferably the night before, place your steaks or chops into a plastic bag to marinate in the Worcestershire and garlic.


Pork steaks marinating

Bring a nice deep frying pan to a medium-high heat with either the lard or oil to fry off the steaks. Try not to move them so you get a lovely, deep colour on both sides.

Pork steaks browning

Add the frozen onions after both sides have some colour, and allow them to create a bit of liquid for clearing the fried bits off of the bottom of the pan.

Pork and onions.jpg

Add the green beans and mix into the onions. You can add up to one cup of water to help if needed.

Stir the liquid created with the dried oregano before adding the tin of soup.

Stack the steaks to one side whilst you incorporate the soup and the onion and green bean sauce.

Add another splash of water if you want a thinner sauce, but it will reduce as you decrease the heat to medium-low.

Allow the sauce to come to a slight bubble over the steaks, for about ten minutes to keep the steaks tender.

While the pork is finishing and the sauce is reducing, scrub a few good-sized potatoes and poke them each in several places before placing on a microwave safe plate.

Microwave on high (or use the “baked potato” setting) for 8–12 minutes, or until they’re all soft to the touch.

Once the potatoes are all cooked through, roll them in your hands with an oven glove to loosen the potato inside. Allow the potato to cool slightly before peeling away the skins by hand.

Add the butter and milk, salt and pepper, and mash together with a fork. Reheat if necessary before serving.

As the sauce for the pork reduces, add salt and pepper to taste. Optional additions are a bit of cream and dried tarragon right at the end, which I find add a richness and aromatic quality. I mix them in right before I turn off the heat.

Serve the steaks with the mash, and drench them both in the gorgeous sauce and beans. I promise you won’t be disappointed.

Forkful of pork and mash

Slow-cooked Mexican shredded beef recipe

When we get into the early parts of summer, I start to get really lazy and fall out of love with being in the kitchen. It’s hot. I don’t want to be hotter. I haven’t built up my tolerance for warm weather and so I abandon the cooker. I usually end up with lots of grilled food and salads, fresh fruit desserts and sweet corn on the cob. But there’s always the allure of roasted, stewed and baked foods that require a modicum of sweat equity, as it were, if you want to cook for yourself and avoid breaking the budget with takeaways. Enter the crock pot: a delightful convenience that also works magic on meats with the low and slow method.

I used to think it couldn’t be that important to sear meats before putting them in the crock, but for the sake of one dish dirtied, it’s completely worth the additional flavor. The secret to searing is to just leave it alone; place a steak or piece of poultry onto the pan and don’t even think about wiggling it for a couple of minutes at least. It really does make all the difference to the depth of flavor, even after all of the spices added. I use a jar of salsa verde to cover the meat, but if you can’t find green salsa, you can use any tomato-based salsa that you love to the same effect. I add dry spices towards the end of the recipe to taste, based on the flavor of the beef and salsa, after a few hours. Each salsa is unique, so it will flavour the beef in its own right; however, it’s mostly used for the acidity in the tomatoes, which help to break down the beef and keep it super tender.

This is a favorite when steak is on sale. I know I can make it last for many more meals than 6 steak dinners, and the kids will eat it once it’s wrapped in a burrito. I’ll usually make my refried beans to go with this (early in the morning if it’s a scorcher), but you can have a lovely meal with just this beef in a wrap, over a salad, or topping nachos. I used a healthy portion of the shredded beef to make enchilada casserole when my parents came over for dinner: an easy layering of corn tortillas, beef, refried beans, cheese and enchilada sauce. My husband routinely puts the cold beef on a sandwich for lunch, and I’ve been known to toss some into my scrambled eggs. The versatility is endless, and it’s just incredibly delicious. Hope you love it!

Slow-cooked Mexican shredded beef

You’ll need:

  • 4 to 6 good-sized lean steaks, your favourite cut (or whatever is on sale)
  • ½ teaspoon garlic powder
  • ½ teaspoon ground black pepper
  • ½ teaspoon cumin powder
  • ½ teaspoon paprika
  • 1 tablespoon vegetable oil
  • 1 24oz jar of salsa verde (or salsa of choice)
  • ½ teaspoon smoked paprika, to taste
  • ½ teaspoon chili powder, to taste (I like chipotle powder)
  • ½ teaspoon cumin powder, to taste
  • Up to 2 teaspoons salt, to taste
  • Up to 1 teaspoon granulated/caster sugar, to taste
  • ½ cup rough cut, fresh coriander/cilantro, to taste

The method:

Allow your steaks to come to room temperature and dust (dry rub) with the dry spices listed on the first half of the list.

Warm your pan and the oil before adding the steaks for searing. Avoid moving the steaks to allow a good colour to develop, usually 2 to 3 minutes on each side.

steaks in pan

Layer the seared steaks into the crock pot with the salsa, coating the bottom of the crock pot with about 1/3 of the jar of salsa and the remainder over the top of the steaks.

salsa verde

Seal the lid and allow the steaks to stew on high for 4–6 hours. You’ll barely have to look at this until a couple of hours in, when you might want to stir the steaks a bit to make sure everything’s covered.

beef in crock pot

After 3–4 hours, when you get the chance, take two forks and try to pull some of the steaks into smaller pieces. Don’t worry if it still seems a bit tough – just cover it up again and try after another hour. Once it’s easy to pull the meat apart with two forks, go ahead and shred up as much as you like, leaving larger pieces for texture according to your preference.

There should be plenty of beef stock and salsa remaining after 4–5 hours, so that it’s covering the meat in a runny sauce. Taste the sauce to see what you’ve created with your chosen salsa. If you love it as is, leave the sauce to reduce a bit and you’re done. If you want to vamp it up a bit, now’s your chance. I add the second half of the list of dry spices while there’s still a fair bit of liquid, to ensure it’s incorporated. I enjoy the smokiness of chipotle powder and smoked paprika added at the end, and sugar to taste to enhance the spice.

It couldn’t be easier, but you can make this your own by try different salsas, adding shredded carrots and onions, or upping the heat index with fresh chili. Any way you shred it, it’s gonna be a winner.

Porky Pie recipe

Comfort food is delightful in the winter, when jumpers and jackets cover their calorific side effects. As we enter Spring, however, I try to lighten our meals a little, in anticipation of shorts and vest tops. This recipe is a mid-week crowd pleaser; not cottage, not shepherd’s, but porky pie. It’s a quick, healthy meal that doesn’t take more than 30 minutes from fridge to table.

Ground pork is lovely and lean, but still has fabulous flavour if you give it a chance to brown. I add chopped mushroom to the meat to add volume, texture and flavour, but the kids would never know it! This is a gluten-free recipe that could be vegetarian if you use Quorn instead of meat. The usual carrots and peas add even more veg, texture and freshness to this delicious favourite.

My kids aren’t fond of white potato mash – they prefer sweet potato, so I’ve made this with sweet potato mash many times and it’s wonderful. This recipe is more traditional, with white or yellow potato mash on top, but if you’re really pressed for time midweek, you can use instant mash potatoes to top the meat. This saves peeling, boiling and mashing yourself, and only involves the kettle and a bowl. For families with less pernickety children, the instant mash is a real timesaver, and adding a little dollop of crème fraiche or soured cream makes all the difference for the taste. The pork gravy tastes amazing no matter how you top it!

Porky Pie recipe.png

You’ll need:

  • 1lb ground pork
  • 1 cup chopped white onion (I use frozen)
  • 2 tablespoons Worcestershire sauce
  • 1 cup chopped brown mushroom
  • 1 cup chopped or grated carrot
  • 1 teaspoon garlic powder
  • 1 teaspoon dried oregano
  • ½ teaspoon chicken stock concentrate, or ½ cube dried chicken stock
  • 1 teaspoon tomato paste
  • 1 cup frozen sweet peas
  • Optional 1 additional tablespoon Worcestershire sauce near the end
  • Salt and pepper to taste
  • 4 cups of white potato mash (if not using instant)
  • 3-5 medium russet potatoes
  • 1 cup low fat milk
  • 1 tablespoon salted butter
  • Salt and pepper to taste
  • Optional ½ cup shredded cheese

The method:

If you’re making your own mash, get a pot of water on the cooker to bring to the boil, and wash and quarter your potatoes so they’re ready to add to the water straight away.

Choose a nice wide pan for browning your meat and bring it to a medium-high heat. Add the chopped onions, ground pork and Worcestershire sauce and mix together, breaking up the meat and distributing the onions and sauce.

Leave the meat for a good 2 minutes to allow one side to brown deeply. Resist the temptation to stir as you want the flavour to stick. This is a great time to chop mushrooms and carrots.

Add the dry spices to the meat before your next stir and coat the meat before leaving it for another 2 minutes.

Add your chopped mushroom and carrot once the meat is mostly browned and mix into the mixture well.

Next, add the chicken stock and tomato paste, and perhaps a splash of water to help dissolve, but the meat and veg will have produced a bit of liquid to help stir into the gravy.

Porky Pie filling

Add the frozen peas and distribute into the mixture, reduce the heat to medium-low and cover. Allow the mixture to simmer covered for about 10 minutes.

While the meat is simmering, whip up your mash with either the kettle water and packet, or the boiled potatoes you’ve drained in the sink. If making from-scratch mash, I add the boiled potatoes back to the pan with the butter and use a fork to smash. I add 1% milk, and salt and pepper to taste. The handful of shredded cheese is optional, but adds colour and creaminess.

After about 10 minutes, taste the pork and add one more splash of Worcestershire to taste. I love the flavour, so add that last minute splash before it goes into the oven. You’re fine to use salt and pepper to taste if you prefer.

Pour the meat mixture into the bottom of a baking dish (I use a square non-stick) and cover with your mash.

Spreading potatoes on porky pie.jpg

Slide the pie into a preheated oven at 200C/400F for about 15 minutes. It doesn’t take long for bubbles, so an additional baking tray underneath is advised. Allow the pie to cool slightly before serving and enjoy!

Porky Pie close-up.jpg

Sparkly Mummy

Roasted Sweet Potato and Lentil Curry recipe

This a great detox dish if you’re fed up of heavy meals and roasts after Christmas. It’s naturally sweetened by the roasted sweet potatoes, and brightened with lemon or lime juice. My daughter happily scoops up this dinner with her tiny 4-year-old hands, relishing every bite. She even asked for it for lunch, declaring she hates sandwiches and needs lentils and rice. It is a perfect combination for young eaters – easy to eat independently once mummy mixes it together so the rice is coated.

I like the texture and sweetness that oven-baked sweet potato adds to this recipe, and the kids do as well. I’m usually the kind of cook that likes a one-pot meal, but the added baking dish is totally worth it for this. The bonus in the winter is the warmth to be gained from 45 minutes of a high temperature oven. Yes please! This recipe includes carrots, sweet peppers and peas in the rice, so it packs a veggie punch. No meat here, but you could add some tandoori chicken from my previous recipe if you feel like you need it. Lentils provide plenty of protein, though, so we don’t miss the meat. Serving it with a bit of Greek yogurt also adds protein, and creaminess!

I must admit that I don’t measure my spices – I add in dashes – so the measurements in the recipe are approximate. You can use a tandoori spice mix, garam masala or a curry powder that you like instead, but the below spices are those that I find work best with this recipe, so I dash them in. If you prefer, you can add about 1 tablespoon of your mix of choice instead of those below, but I encourage you to try your hand at a bit of dramatic flair and pinch, dash or sprinkle right into the pan.

This is best served with rice; I use jasmine rice because you don’t need to rinse it and it’s a straightforward 1 rice to 2 water ratio. For curry, I like to add frozen peas and a dash of Chinese Five Spice to cook with the rice for the aromatic favour it adds. Whether using a pot or rice cooker, I recommend layering the frozen peas first, then a tab of butter and sprinkle of five spice, then the rice and lastly the water. It saves the rice from burning to the bottom if, for a multitude of mom reasons, you can’t get to it right on time.

Even on its own, this lentil dish is delicious and can be spiced up with chili for braver tastebuds. My kids like it mild, so I don’t have chili here, but feel free to add it to taste.

Sweet potato and lentil curry vertical.jpeg

You’ll need:

  • 1 medium sweet potato
  • 1 tablespoon vegetable oil of choice, high heat tolerant (olive oil isn’t recommended)
  • 1 tablespoon ghee or veg oil
  • 1 medium chopped white onion (about ¾ cup if using frozen)
  • 1 cup/1 medium finely chopped or grated carrot (I use a cheese grater)
  • 1 cup/1 medium finely chopped bell pepper (yellow hides really well)
  • 1 cup rinsed red lentils (or yellow, but please rinse well)
  • ½ teaspoon salt
  • ½ teaspoon cardamom powder
  • ½ teaspoon cinnamon powder
  • ½ teaspoon turmeric powder
  • ½ teaspoon garlic powder
  • ½ teaspoon cumin powder
  • ½ teaspoon paprika powder
  • 1 cup roughly chopped coriander/cilantro (fresh is best, but use less if using those little tubes…)
  • 3+ cups of warm water (additional water to top it up as needed to soften lentils)
  • 3 tablespoons Greek yogurt (optional, but adds creaminess)
  • If serving with rice, I use 2 cups jasmine rice, 4 cups water, 1 cup frozen peas, a tab of butter and a dash of Chinese Five Spice.

The method:

Begin with preheating your oven to 400F/200C for the sweet potatoes.

Peel and chop the potato into roughly the same size pieces for even cooking and add to the tray.

Toss the potatoes in a bit of oil and cover with aluminium foil for the first half of the baking time (20-30 minutes).

In a large skillet, add the ghee or oil, onion and carrots, and lightly brown over a medium-high heat for 2-3 minutes.

Measure and rinse your lentils, ensuring the water runs clear through a sieve. Add the lentils and the peppers to the onions and carrots.

Add your dry spices and coriander to the mixture. You can use a premixed dry curry spice if you prefer.

Give it all a good stir to coat the lentils well with your spices, and allow them to lightly fry for about 2 minutes before adding the water to cover the lentils.

Reduce the heat to med/low, cover your skillet with a lid and allow the curry to soften. You want to be sure the lentils are covered, so you may need to top up the water occasionally. This should only take 20 minutes, but it depends on the lentils.

After 20-30 minutes in the oven, remove the aluminium foil from the sweet potatoes and finish uncovered for an additional 15-20 minutes, or until lightly-browned edges show off the natural caramelisation.

Roasting sweet potatoes.jpg

Once the lentils are just about the desired texture, the sweet potatoes should also be done, approximately 45 minutes all in. Remove the potatoes from the oven and add to the curry. The potato pieces will naturally break apart into the curry as you stir them into the mixture.

At this point, I’ve usually started my rice. There’s a lot going on with this dish, but it simmers away without needing attention, so there’s plenty of time to get the rice going in time for serving. The curry will happily bubble away, reducing to your favourite consistency.

The roasted sweet potato thickens the dish, so you can mix it thoroughly or leave larger bits – it’s up to you! If you like the added creaminess, you can also add the Greek yogurt to mellow the spices and sweetness. If adding yogurt, be sure the temperature is reduced and you just bring the curry back to a light bubble before serving.

We enjoy this with just a bit of rice and a nice big ladle full of lentils. My husband and I usually add a dash of chili flake or a spicy chutney, just for the heat. My daughter especially loves this curry, and doesn’t even need rice. I hope you give this a try and enjoy!
 

Sparkly Mummy


Tips for a perfect, portable Lemon Drizzle Cake

My mate who usually does the recipes for this blog has had the typical run of awful winter bugs this week, so hasn’t had time to write anything up for us. I’m not the cook that she is, but I occasionally excel at a bit of baking, when I apply myself. Serendipitously, this week I had the need (and by need, I mean the need to show off) to bake something for an event with my work colleagues.

The challenge I faced was that I needed to travel into London with whatever I baked, and there was a train strike on. So I needed something that I could carry on a taxi, a bus, two trains, and for a long walk, without it turning into an inedible lump of crumbs by the time I arrived at my destination.

The solution I found was this Lemon Drizzle Traybake with a lovely crunchy topping, which I found on Mary Berry’s website. That website has weird rules that you have to ask permission to link to it, so I won’t link to it, but I’m sure you can find it using our friend Google (as the BBC would say, other search engines are available) (but not really).

I’m also reliably informed that lists of ingredients cannot be copyrighted, so I’m cool to list them here, plus I’ve added all the equipment you need so there are no surprises if, like me, you don’t read the method until it’s too late. The method has been adapted to suit my own skills – in other words, I’ve tried to make it idiot-proof. I’m happy to report that not only did it travel well, but all of my colleagues ate more than one piece, so it must have been good.

Lemon Cake vertical.jpeg

You’ll need:

  • 225g (8 oz) butter, softened
  • 225g (8 oz) caster sugar
  • 275g (10 oz) self-raising flour
  • 2 teaspoons baking powder
  • 4 eggs
  • 4 tablespoons milk
  • 2 small unwaxed lemons
  • 175g (6 oz) granulated sugar
  • a big mixing bowl
  • 30 x 23 x 4 cm (12 x 9 x 1 ½ inches) metal baking tray
  • cooking spray oil
  • non-stick baking parchment
  • Scissors
  • electric mixer or wooden spoon coupled with strong mixing arm
  • rubber spatula
  • a wire cooling rack

The method:

One thing to consider: this cake tastes a lot better if you make it the day before you want to eat it.

At least 3 hours before baking, put your butter out on the worktop to soften. If you cut it into smaller pieces, it will soften faster.

When your butter is soft, preheat your oven to 180C/160C Fan/Gas 4. Then, rummage around and find your baking tin. The tin I used is a tray I would normally use for making fish fingers and chips. It is a very shallow baking tray and I think you need to make sure you have the right depth of tin to get this right (see dimensions above).

Measure out a rectangle of baking parchment so it is the same size as the tin (including the sides, not just the base), and cut it with the scissors. If you try to rip it on the crap ripping thing on the edge of the box, it will go all crooked and Mary Berry will have bad dreams.

Baking equipment.jpg
Can you tell I didn’t take any pictures of the actual baking process?

Spray the tin with your cooking spray and then stick the baking parchment onto it neatly as possible, pushing it down so it sticks to the spray.

Now it’s time to grate your the rinds of your 2 lemons into your big mixing bowl. Do use a fine grater, like one you’d use to grate parmesan cheese. If you use a proper lemon zester, the pieces will be too big and might be a bit chewy in the cake.

A grater.jpg
Be careful not to grate your knuckles like I did.

Once you’ve done your lemon rind grating, put your naked lemons aside for later. Then stick your softened butter, caster sugar, self-raising flour, level teaspoons of baking powder, eggs and milk into your mixing bowl.

Use your electric mixer now to mix the mixture for about 2 minutes, until smooth. You could stir it with a spoon if you don’t have a mixer, but your arm will get tired.

Then, dump the mixture into your lined tin, using your rubber spatula to get all the mixture out of the bowl and then to smooth out the mixture in the tin. Try not to drop the bowl like I did. It got heavy after a minute of holding and scraping!

Stick your tray of goodness into the oven and bake for 35-40 minutes, or until the cake springs back when touched lightly with a finger.

When it’s finished, remove it from the oven and leave to cool in the tin for just a few minutes. Then lift it out onto a wire rack with the baking parchment still attached. Place your tray underneath the wire rack to catch the drips of the topping you’re going to make. When it cools enough so you won’t burn your hands, extremely carefully remove the baking parchment. I found ripping it in strips worked for me, but you might find a more clever method.

Now, juice your two naked lemons and add the granulated sugar to the juice. It should have a runny consistency but enough sugar so that every spoon has lemony sugary-ness. You may need to add extra sugar for it to be right. While the cake it still warm, spoon this topping onto the cake, one teaspoon at a time, and spread it out evenly across the cake.

Leave the cake to cool completely, then cut it into little squares and store in an airtight container. Eat with tea and friends. Or hide in a cupboard so you don’t have to share it with your kids.

Sparkly Mummy
ThePhdMama

Tortilla Soup recipe

Pretty much any restaurant that serves Mexican food serves a version of Tortilla Soup. It’s brothy, fragrant and delicately spiced. Most recipes ask you to have a bit of shredded chicken on hand to pour the broth over when serving. I don’t usually have baked or boiled chicken laying around, unless I have a leftover roast that hasn’t been picked bare, so my recipe includes cooking the chicken in the broth. As per the name, tortillas are usually grilled and sliced to top the soup, but I’ve found a handful or corn or flour tortilla chips add the texture, flavour and namesake without the fuss of grilling my own.

If you haven’t tried Mexican soups, you haven’t truly embraced the winter warmer. This is a simple dish, but the depth of flavour may surprise you. Many recipes for tortilla soup have as little as four spices, keeping a clear broth to pour over shredded chicken. I like to incorporate as many vegetables as possible when cooking for my family, so I load this one up with onion, carrot, white beans and tomato. I also thinly slice chicken breast whilst still slightly frozen, and then boil it in the soup to keep it moist and tender, and add natural chicken flavour to the soup. This allows the chicken to begin to shred after boiling away for just twenty minutes or so. It’s an all in one pot, midweek meal that smells and tastes amazing.

tortilla-soup-in-the-bowl

You’ll need:

  • 1 teaspoon oil of choice
  • 1 cup chopped onion (I use frozen)
  • 1 teaspoon minced garlic (fresh or dried)
  • 1 cup grated carrot
  • 1 8oz tin diced tomato
  • 1 tin 8oz white/cannellini beans
  • 1 teaspoon coarse salt
  • 1 teaspoon paprika
  • 1 teaspoon cumin powder
  • 1 teaspoon oregano flakes
  • 1 teaspoon chili powder (optional depending on kids’ heat threshold)
  • 2-3 boneless, skinless chicken breasts
  • 4-6 cups of water
  • 2 cups chopped coriander/cilantro (fresh is best)
  • Salt and white pepper to taste
  • 1 small bag of corn or flour tortilla chips the break up on top when serving
  • Optional shredded cheese for serving

The method:

It’s easiest to prepare your chicken first, so that you have clean hands for stirring and adding spices. I like to slice chicken breast when it’s slightly frozen, so this dish is perfect for a packet I’ve had out thawing for dinner. Fresh chicken (or no chicken for the vegetarians) is still perfectly wonderful – I just tend to keep small freezer bags with meal-size portions of chicken and minced beef on hand for meal planning. Slice the chicken against the grain in thin strips. I find this works best for the shredding you want to achieve in a short amount of time.

I like to do this in one pot, so I begin with heating the oil, onions and garlic together over a medium high heat in a large soup pot. After a minute or two, the onions should be translucent and the garlic lightly frying.

Add the grated carrot, tomato and salt, and stir into the mixture. Drain and rinse the beans before adding to the pot.

Once the beans are mixed in, add the dry spices and give it a good stir before allowing it to bubble.

Once the tomato and carrots have softened slightly – 5 minutes or so should do the trick – add the chicken slices and just coat with the mixture.

Add the water straight away to avoid frying the chicken, you want the chicken to be submerged to boil.  

Allow the water to come to the boil before adding your chopped coriander.

Once the pot is bubbling nicely, the chicken will go white quickly and the beans will begin to break down. I have been known to add only half of the tin of beans to begin with, and save the second half for later to retain texture, but it’s up to you if you want to add this step.

I allow this soup to boil with the cover on for about 15 minutes before reducing the temperature to a simmer and removing the lid. This helps the chicken to soften and absorb the flavours of the soup.

You can let this simmer for ages, but it’ll be ready after 30 minutes if you’re hungry – even sooner if you just make the broth and pour it over leftover chicken or no chicken at all.

To serve, my kids like this ladled over rice, with a few corn chips broken on top. I love a big, steamy bowl as it is, a couple of corn chips and a small handful of shredded cheese on top. My husband just wants a bowl of soup with a few drops of hot sauce and he’s happy. However you take it, this is a family favourite that offers a Mexican flare and isn’t heavy with refried beans and cheese. It’s veggie packed, bursting with flavour and aroma, and is sure to make your family think you slaved for hours to get such succulent chicken. Buen apetito!

tortilla-soup-in-the-pan-2

Sparkly Mummy
A Mum Track Mind

One-pot tuna pasta recipe

I’m all about the quick, 20-minute meal to feed the hungry crowd, and this version of classic tuna pasta is dead easy. I really like the sweetness added by frying off a few onions in butter before adding the tuna. Usually, tinned tuna is simply stirred into the dish, but I fry it a bit with the onions as I break up the meat, and it just adds a depth of flavour without being labour intensive.

You can use gluten-free pasta if you prefer – any shape will do – but I like standard macaroni for this dish. I know it’s tempting to use a tin of condensed cream of mushroom or chicken soup, but I promise this is just as easy and less gloppy. I only want one pot to clean, so I boil the pasta and peas together, make the sauce while they drain, and then toss it all together again. Easy peasy.

tuna-pasta-in-the-bowl

You’ll need:

  • 2 cups dry pasta
  • 1 cup frozen peas
  • 4-6 cups water

For the sauce:

  • 1 cup chopped white onion (I use frozen)
  • 2 TB butter
  • 1 tin of tuna
  • 1 tsp dried garlic
  • ½ tsp dried oregano
  • 1 cup single cream or half and half
  • 1 cup shredded cheese of choice (I use mild cheddar for the kids)
  • Salt and pepper to taste
  • Optional splash of milk to loosen the sauce as preferred

The Method:

Bring a pot of water to the boil and add your pasta. Adjust the quantities for a larger pot, but this should easily feed a family of four to five people.

After half the cooking time for your pasta, add the frozen peas and bring back to the boil.

Once the pasta is tender, drain the pasta and peas and allow to rest while you use the pot.

pasta-and-peas

Add butter and onions over a med-high heat and allow the onions to go translucent.

Add the tinned tuna and break it up, coating it with the butter and onions, and allow the mixture to fry slightly.

Add the dried garlic and oregano, and mix well before pouring in the cream. Stir well, continuing to break up the tuna and allowing the cream to warm.

Add the cheese a bit at a time, stirring well into the creamy tuna in about three batches. Feel free to add more cheese than stated if you love it!

tuna-pasta-sauce-with-cheese

Allow the sauce to begin to bubble slightly before returning the pasta and peas. Mix well and give it a taste to add salt and pepper as you see fit.

This couldn’t be faster for a midweek meal; most ingredients are staples! Hope you enjoy this no-fuss version of a classic tuna pasta. If you just can’t live without the cheesy-baked top, go ahead and throw it into a baking dish and cover with shredded cheese. I didn’t have the time to oven bake, and this was on the table in 20 minutes! It left me time to play some Uno with the kids.

Sparkly Mummy

Layered enchilada casserole recipe

I grew up in Los Angeles, and Mexican and Latin foods are comfort foods for me. For over a decade, I lived in the UK, outside of London (where there would have been wider choice of ingredients), and I struggled to find the ingredients for most of my favourite dishes. I even imported things like roasted, diced chillies, and chipotle spice via home visits or care packages from my mum. These days, however, even a local Tesco has a good chance of having most of the ingredients for this recipe – the times, they are a’changing.

I am a big fan of enchiladas. They’re especially nice for my husband’s wheat/gluten allergy, as they’re a corn tortilla dish instead of flour. The enchilada sauce (basically watery chili powder) can be bought in a tin or jar, and it saves a step and a pan. You can buy enchilada packs in the supermarket, and it should have corn tortillas and the red enchilada sauce. If you prefer to use Quorn over beef, it’s also vegetarian, and you can also substitute refried beans for meat for the same result.

Most of the time, if you order an enchilada plate in a restaurant, it’s dripping with cheese and sauce, and can be a little overwhelming. This recipe misses none of the flavour, but includes the all-important hidden veg and goes a little easier on the cheese. Casserole presentation allows for several more servings in the baking dish, and is so much easier to put together than trying to roll up each enchilada. I even let the kids help me layering the tortillas, meat, cheese and sauce in assembly line fashion. It’s delicious fun, topped off with a bit of soured cream and salsa or a side salad – the whole family will be coming back for more.

Plated enchilada vertical.jpg

You’ll need:

  • 1 cup chopped white onion (I use frozen)
  • 1 tsp veg oil of choice
  • ½ tsp ground cumin
  • ½ tsp ground coriander
  • 1 tsp fresh or dried garlic minced
  • ½ tsp smoked paprika
  • ½ tsp chipotle pepper powder
  • 1lb lean minced beef
  • ½ cup shredded carrot
  • 1 cup chopped coriander/cilantro (frozen or fresh)
  • I packet of small corn tortillas (approximately 10-15 used)
  • 1 8oz jar or tin of enchilada sauce (if you can’t find ready-made, it’s pretty easy to make)
  • 3-4 cups shredded mild cheese (Double Gloucestershire and Red Leicester are lovely for this)

The method:

To begin, I add the onions and dry spices to a hot pan with a bit of oil. Once the onions are coated, I add the beef and mix it all together in the pan.

Fry off the mixture, browning the beef and onions together. This will keep the spices from burning and allows the meat to absorb all of those flavours.

Enchilada casserole ingredients

Once the beef is mostly browned, add the carrots and coriander with about 1/3 cup of water and reduce heat to simmer.

While the beef simmers and reduces, you can begin to layer the casserole in a baking tray.

Add a couple of tablespoons of the sauce to the bottom of the baking dish before adding a layer of tortillas. I usually cut some of the tortillas in half to fit nicely against the sides.

Add a layer of shredded cheese onto the tortillas, and then a layer of meat, before covering with another layer of tortillas. Top the tortillas with another couple tablespoons of the sauce before the cheese the next time to wet them.

kids helping assemble enchilada casserole

Repeat once or twice, depending the depth of your baking dish. The last layer should be just sauce and cheese, for a nice crispy, gooey cheese top.

Bake uncovered at 180C/350F in the top 1/3 of the oven for approximately 20-25 minutes, or until the top is golden. Allow to rest for 5 minutes or more to cool before serving.

enchilada-casserole-in-the-oven

I usually add a dollop of soured cream and some hot sauce to mine, but the kids like it just the way it is!

Sparkly Mummy
Link up your recipe of the week

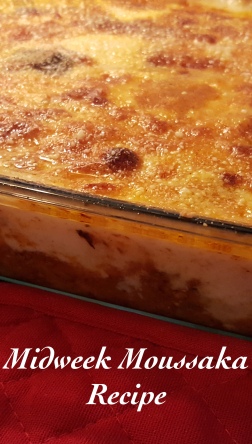
Midweek Moussaka recipe

Autumn is a great time to try harvest foods like aubergine and make casserole bakes that warm the house. Greek food is something I rarely make at home, preferring to indulge at a restaurant or friend’s home, but this moussaka recipe is hard to resist. Moussaka is a bit like Greek lasagne: usually layered, meaty and loaded with cheese. The béchamel sauce may be daunting, but I’ve made this recipe a mid-week version that will hopefully calm your aversion. Something magical happens in the oven when the sauce thickens and browns across the top – it’s absolutely worth a try.

My family enjoy this dinner so much. I don’t think there’s anything better than sweet and savoury to get kids interested. The meat is browned with cinnamon and balsamic vinegar, and the béchamel is creamy with milk and parmesan cheese. The aubergine, or eggplant, is lightly fried in olive oil, but I use cubes rather than taking the time to thinly slice for layering. The final product is worth every ounce of effort, and I guarantee this moussaka recipe takes less than most. Even if you think you don’t like aubergine, I think you’ll be surprised at how flavourful, hearty and delicate this dish really is.

Midweek Moussaka Recipe

You’ll need:

  • 2-3 aubergines/eggplants peeled and cubed
  • 2-4 TB olive oil
  • 1 lb minced beef (the leaner the better so you don’t have to drain)
  • 1 cup chopped white onion
  • ½ tsp cinnamon
  • ½ tsp nutmeg
  • 1 tsp garlic granules
  • 1 tsp dried oregano
  • 1 tsp dried parsley
  • 1 tsp salt
  • 1 tsp black pepper
  • 1 8oz tin of tomato sauce
  • ¼ cup balsamic vinegar
  • 4 cups warm milk
  • ½ cup salted butter
  • 6 TB all-purpose flour (not self-rising)
  • 1 egg beaten
  • 1-2 cups grated parmesan cheese

The method:

To begin, peel the aubergines and cube them into 3 cm/1 inch cubes. Some say you should salt the aubergine to absorb water … I usually can’t be bothered, but give it a try if your eggplant seems particularly wet.

cooking-the-aubergines

In a large pan, warm a tablespoon or two of olive oil before adding about half of the aubergine cubes. Be sure to leave space between pieces and fry off in two or three batches. Allow the slightly golden-edged aubergine to rest on kitchen roll while you finish batches and the meat.

Once you’ve spent ten minutes or so lightly frying the cubes, you can reuse the pan for the beef.

Add the chopped onion, minced beef and dry spices to the pan with what remains of the oil and any aubergine bits.

Cooking mince for moussaka.jpg

Allow the meat to brown nicely before adding the tomato sauce and balsamic vinegar. Bring to the boil before reducing the heat to a simmer for about 15 minutes. Now is a good time to preheat the oven to 180C/350F.

While the meat simmers and reduces, it’s time for the béchamel sauce.

I begin with using a microwave-safe measuring cup or bowl to warm the milk. Microwaving 3-5 minutes on high should do the trick, but you want to be sure the milk is nearly boiling.

In a non-stick pan, melt the butter and add the flour. I use gluten free, and may use a bit less than stated above, but the roux you create will be thick. Mix well with a rubber spatula until smooth.

Gradually add the hot milk, stirring quickly to smooth into the roux. This sounds intimidating, but it’s really going to come through for you.

Once the milk is fully incorporated into the butter and flour, allow it to lightly boil over a low heat and thicken slightly. Remove from the heat and mix in ½ cup of the parmesan.

Cooking bechamel and tomato sauce for moussaka.jpg

Now for the assembly: pour the partially-fried aubergine cubes into the bottom of a large baking dish. Sprinkle about ½ cup of the parmesan cheese over the top of the cubes.

Moussaka ready to bake.jpgPour the meat mixture over the aubergine and add another layer of parmesan sprinkle before pouring the beaten egg over the top.

Pour the slightly cooled béchamel sauce over the top and give it a little wiggle to settle the casserole before popping it in the oven.

Bake at 180C/350F for 45 minutes to an hour, or until the top is golden and solid. Allow the dish to cool before serving to preserve the layers, or dish up straight away if you’re not fussed about presentation.

Enjoy!

plated-moussaka

Sparkly Mummy