Tortilla Soup recipe

Pretty much any restaurant that serves Mexican food serves a version of Tortilla Soup. It’s brothy, fragrant and delicately spiced. Most recipes ask you to have a bit of shredded chicken on hand to pour the broth over when serving. I don’t usually have baked or boiled chicken laying around, unless I have a leftover roast that hasn’t been picked bare, so my recipe includes cooking the chicken in the broth. As per the name, tortillas are usually grilled and sliced to top the soup, but I’ve found a handful or corn or flour tortilla chips add the texture, flavour and namesake without the fuss of grilling my own.

If you haven’t tried Mexican soups, you haven’t truly embraced the winter warmer. This is a simple dish, but the depth of flavour may surprise you. Many recipes for tortilla soup have as little as four spices, keeping a clear broth to pour over shredded chicken. I like to incorporate as many vegetables as possible when cooking for my family, so I load this one up with onion, carrot, white beans and tomato. I also thinly slice chicken breast whilst still slightly frozen, and then boil it in the soup to keep it moist and tender, and add natural chicken flavour to the soup. This allows the chicken to begin to shred after boiling away for just twenty minutes or so. It’s an all in one pot, midweek meal that smells and tastes amazing.

tortilla-soup-in-the-bowl

You’ll need:

  • 1 teaspoon oil of choice
  • 1 cup chopped onion (I use frozen)
  • 1 teaspoon minced garlic (fresh or dried)
  • 1 cup grated carrot
  • 1 8oz tin diced tomato
  • 1 tin 8oz white/cannellini beans
  • 1 teaspoon coarse salt
  • 1 teaspoon paprika
  • 1 teaspoon cumin powder
  • 1 teaspoon oregano flakes
  • 1 teaspoon chili powder (optional depending on kids’ heat threshold)
  • 2-3 boneless, skinless chicken breasts
  • 4-6 cups of water
  • 2 cups chopped coriander/cilantro (fresh is best)
  • Salt and white pepper to taste
  • 1 small bag of corn or flour tortilla chips the break up on top when serving
  • Optional shredded cheese for serving

The method:

It’s easiest to prepare your chicken first, so that you have clean hands for stirring and adding spices. I like to slice chicken breast when it’s slightly frozen, so this dish is perfect for a packet I’ve had out thawing for dinner. Fresh chicken (or no chicken for the vegetarians) is still perfectly wonderful – I just tend to keep small freezer bags with meal-size portions of chicken and minced beef on hand for meal planning. Slice the chicken against the grain in thin strips. I find this works best for the shredding you want to achieve in a short amount of time.

I like to do this in one pot, so I begin with heating the oil, onions and garlic together over a medium high heat in a large soup pot. After a minute or two, the onions should be translucent and the garlic lightly frying.

Add the grated carrot, tomato and salt, and stir into the mixture. Drain and rinse the beans before adding to the pot.

Once the beans are mixed in, add the dry spices and give it a good stir before allowing it to bubble.

Once the tomato and carrots have softened slightly – 5 minutes or so should do the trick – add the chicken slices and just coat with the mixture.

Add the water straight away to avoid frying the chicken, you want the chicken to be submerged to boil.  

Allow the water to come to the boil before adding your chopped coriander.

Once the pot is bubbling nicely, the chicken will go white quickly and the beans will begin to break down. I have been known to add only half of the tin of beans to begin with, and save the second half for later to retain texture, but it’s up to you if you want to add this step.

I allow this soup to boil with the cover on for about 15 minutes before reducing the temperature to a simmer and removing the lid. This helps the chicken to soften and absorb the flavours of the soup.

You can let this simmer for ages, but it’ll be ready after 30 minutes if you’re hungry – even sooner if you just make the broth and pour it over leftover chicken or no chicken at all.

To serve, my kids like this ladled over rice, with a few corn chips broken on top. I love a big, steamy bowl as it is, a couple of corn chips and a small handful of shredded cheese on top. My husband just wants a bowl of soup with a few drops of hot sauce and he’s happy. However you take it, this is a family favourite that offers a Mexican flare and isn’t heavy with refried beans and cheese. It’s veggie packed, bursting with flavour and aroma, and is sure to make your family think you slaved for hours to get such succulent chicken. Buen apetito!

tortilla-soup-in-the-pan-2

Sparkly Mummy
A Mum Track Mind

One-pot tuna pasta recipe

I’m all about the quick, 20-minute meal to feed the hungry crowd, and this version of classic tuna pasta is dead easy. I really like the sweetness added by frying off a few onions in butter before adding the tuna. Usually, tinned tuna is simply stirred into the dish, but I fry it a bit with the onions as I break up the meat, and it just adds a depth of flavour without being labour intensive.

You can use gluten-free pasta if you prefer – any shape will do – but I like standard macaroni for this dish. I know it’s tempting to use a tin of condensed cream of mushroom or chicken soup, but I promise this is just as easy and less gloppy. I only want one pot to clean, so I boil the pasta and peas together, make the sauce while they drain, and then toss it all together again. Easy peasy.

tuna-pasta-in-the-bowl

You’ll need:

  • 2 cups dry pasta
  • 1 cup frozen peas
  • 4-6 cups water

For the sauce:

  • 1 cup chopped white onion (I use frozen)
  • 2 TB butter
  • 1 tin of tuna
  • 1 tsp dried garlic
  • ½ tsp dried oregano
  • 1 cup single cream or half and half
  • 1 cup shredded cheese of choice (I use mild cheddar for the kids)
  • Salt and pepper to taste
  • Optional splash of milk to loosen the sauce as preferred

The Method:

Bring a pot of water to the boil and add your pasta. Adjust the quantities for a larger pot, but this should easily feed a family of four to five people.

After half the cooking time for your pasta, add the frozen peas and bring back to the boil.

Once the pasta is tender, drain the pasta and peas and allow to rest while you use the pot.

pasta-and-peas

Add butter and onions over a med-high heat and allow the onions to go translucent.

Add the tinned tuna and break it up, coating it with the butter and onions, and allow the mixture to fry slightly.

Add the dried garlic and oregano, and mix well before pouring in the cream. Stir well, continuing to break up the tuna and allowing the cream to warm.

Add the cheese a bit at a time, stirring well into the creamy tuna in about three batches. Feel free to add more cheese than stated if you love it!

tuna-pasta-sauce-with-cheese

Allow the sauce to begin to bubble slightly before returning the pasta and peas. Mix well and give it a taste to add salt and pepper as you see fit.

This couldn’t be faster for a midweek meal; most ingredients are staples! Hope you enjoy this no-fuss version of a classic tuna pasta. If you just can’t live without the cheesy-baked top, go ahead and throw it into a baking dish and cover with shredded cheese. I didn’t have the time to oven bake, and this was on the table in 20 minutes! It left me time to play some Uno with the kids.

Sparkly Mummy

Layered enchilada casserole recipe

I grew up in Los Angeles, and Mexican and Latin foods are comfort foods for me. For over a decade, I lived in the UK, outside of London (where there would have been wider choice of ingredients), and I struggled to find the ingredients for most of my favourite dishes. I even imported things like roasted, diced chillies, and chipotle spice via home visits or care packages from my mum. These days, however, even a local Tesco has a good chance of having most of the ingredients for this recipe – the times, they are a’changing.

I am a big fan of enchiladas. They’re especially nice for my husband’s wheat/gluten allergy, as they’re a corn tortilla dish instead of flour. The enchilada sauce (basically watery chili powder) can be bought in a tin or jar, and it saves a step and a pan. You can buy enchilada packs in the supermarket, and it should have corn tortillas and the red enchilada sauce. If you prefer to use Quorn over beef, it’s also vegetarian, and you can also substitute refried beans for meat for the same result.

Most of the time, if you order an enchilada plate in a restaurant, it’s dripping with cheese and sauce, and can be a little overwhelming. This recipe misses none of the flavour, but includes the all-important hidden veg and goes a little easier on the cheese. Casserole presentation allows for several more servings in the baking dish, and is so much easier to put together than trying to roll up each enchilada. I even let the kids help me layering the tortillas, meat, cheese and sauce in assembly line fashion. It’s delicious fun, topped off with a bit of soured cream and salsa or a side salad – the whole family will be coming back for more.

Plated enchilada vertical.jpg

You’ll need:

  • 1 cup chopped white onion (I use frozen)
  • 1 tsp veg oil of choice
  • ½ tsp ground cumin
  • ½ tsp ground coriander
  • 1 tsp fresh or dried garlic minced
  • ½ tsp smoked paprika
  • ½ tsp chipotle pepper powder
  • 1lb lean minced beef
  • ½ cup shredded carrot
  • 1 cup chopped coriander/cilantro (frozen or fresh)
  • I packet of small corn tortillas (approximately 10-15 used)
  • 1 8oz jar or tin of enchilada sauce (if you can’t find ready-made, it’s pretty easy to make)
  • 3-4 cups shredded mild cheese (Double Gloucestershire and Red Leicester are lovely for this)

The method:

To begin, I add the onions and dry spices to a hot pan with a bit of oil. Once the onions are coated, I add the beef and mix it all together in the pan.

Fry off the mixture, browning the beef and onions together. This will keep the spices from burning and allows the meat to absorb all of those flavours.

Enchilada casserole ingredients

Once the beef is mostly browned, add the carrots and coriander with about 1/3 cup of water and reduce heat to simmer.

While the beef simmers and reduces, you can begin to layer the casserole in a baking tray.

Add a couple of tablespoons of the sauce to the bottom of the baking dish before adding a layer of tortillas. I usually cut some of the tortillas in half to fit nicely against the sides.

Add a layer of shredded cheese onto the tortillas, and then a layer of meat, before covering with another layer of tortillas. Top the tortillas with another couple tablespoons of the sauce before the cheese the next time to wet them.

kids helping assemble enchilada casserole

Repeat once or twice, depending the depth of your baking dish. The last layer should be just sauce and cheese, for a nice crispy, gooey cheese top.

Bake uncovered at 180C/350F in the top 1/3 of the oven for approximately 20-25 minutes, or until the top is golden. Allow to rest for 5 minutes or more to cool before serving.

enchilada-casserole-in-the-oven

I usually add a dollop of soured cream and some hot sauce to mine, but the kids like it just the way it is!

Sparkly Mummy
Link up your recipe of the week

Midweek Moussaka recipe

Autumn is a great time to try harvest foods like aubergine and make casserole bakes that warm the house. Greek food is something I rarely make at home, preferring to indulge at a restaurant or friend’s home, but this moussaka recipe is hard to resist. Moussaka is a bit like Greek lasagne: usually layered, meaty and loaded with cheese. The béchamel sauce may be daunting, but I’ve made this recipe a mid-week version that will hopefully calm your aversion. Something magical happens in the oven when the sauce thickens and browns across the top – it’s absolutely worth a try.

My family enjoy this dinner so much. I don’t think there’s anything better than sweet and savoury to get kids interested. The meat is browned with cinnamon and balsamic vinegar, and the béchamel is creamy with milk and parmesan cheese. The aubergine, or eggplant, is lightly fried in olive oil, but I use cubes rather than taking the time to thinly slice for layering. The final product is worth every ounce of effort, and I guarantee this moussaka recipe takes less than most. Even if you think you don’t like aubergine, I think you’ll be surprised at how flavourful, hearty and delicate this dish really is.

Midweek Moussaka Recipe

You’ll need:

  • 2-3 aubergines/eggplants peeled and cubed
  • 2-4 TB olive oil
  • 1 lb minced beef (the leaner the better so you don’t have to drain)
  • 1 cup chopped white onion
  • ½ tsp cinnamon
  • ½ tsp nutmeg
  • 1 tsp garlic granules
  • 1 tsp dried oregano
  • 1 tsp dried parsley
  • 1 tsp salt
  • 1 tsp black pepper
  • 1 8oz tin of tomato sauce
  • ¼ cup balsamic vinegar
  • 4 cups warm milk
  • ½ cup salted butter
  • 6 TB all-purpose flour (not self-rising)
  • 1 egg beaten
  • 1-2 cups grated parmesan cheese

The method:

To begin, peel the aubergines and cube them into 3 cm/1 inch cubes. Some say you should salt the aubergine to absorb water … I usually can’t be bothered, but give it a try if your eggplant seems particularly wet.

cooking-the-aubergines

In a large pan, warm a tablespoon or two of olive oil before adding about half of the aubergine cubes. Be sure to leave space between pieces and fry off in two or three batches. Allow the slightly golden-edged aubergine to rest on kitchen roll while you finish batches and the meat.

Once you’ve spent ten minutes or so lightly frying the cubes, you can reuse the pan for the beef.

Add the chopped onion, minced beef and dry spices to the pan with what remains of the oil and any aubergine bits.

Cooking mince for moussaka.jpg

Allow the meat to brown nicely before adding the tomato sauce and balsamic vinegar. Bring to the boil before reducing the heat to a simmer for about 15 minutes. Now is a good time to preheat the oven to 180C/350F.

While the meat simmers and reduces, it’s time for the béchamel sauce.

I begin with using a microwave-safe measuring cup or bowl to warm the milk. Microwaving 3-5 minutes on high should do the trick, but you want to be sure the milk is nearly boiling.

In a non-stick pan, melt the butter and add the flour. I use gluten free, and may use a bit less than stated above, but the roux you create will be thick. Mix well with a rubber spatula until smooth.

Gradually add the hot milk, stirring quickly to smooth into the roux. This sounds intimidating, but it’s really going to come through for you.

Once the milk is fully incorporated into the butter and flour, allow it to lightly boil over a low heat and thicken slightly. Remove from the heat and mix in ½ cup of the parmesan.

Cooking bechamel and tomato sauce for moussaka.jpg

Now for the assembly: pour the partially-fried aubergine cubes into the bottom of a large baking dish. Sprinkle about ½ cup of the parmesan cheese over the top of the cubes.

Moussaka ready to bake.jpg
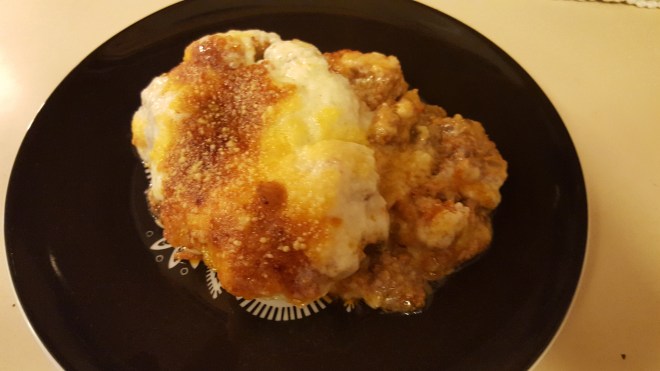
Pour the meat mixture over the aubergine and add another layer of parmesan sprinkle before pouring the beaten egg over the top.

Pour the slightly cooled béchamel sauce over the top and give it a little wiggle to settle the casserole before popping it in the oven.

Bake at 180C/350F for 45 minutes to an hour, or until the top is golden and solid. Allow the dish to cool before serving to preserve the layers, or dish up straight away if you’re not fussed about presentation.

Enjoy!

plated-moussaka

Sparkly Mummy

Shredded coriander (cilantro) chicken recipe

I grew up in California, and I’m pretty sure my first solid food was refried beans. My grandma used to joke that my mother’s first meal outside of the home was at their local Mexican restaurant – a mom & pop kind of place. The owner scooped up my infant mom and sat down with my grandparents, ordered her husband to fetch some refried beans and soft tortilla, and let my mom suck the beans off rolled tortilla while they ate. Home-cooked Southern food is in my Texas-born grandfather’s recipes, and Latin food is a staple I’ve grown up with.

This recipe has been adapted for family life, like so many of mine. I desperately try to balance home-cooked goodness for my family and the desire to let someone else cook. As an essentially lazy cook, I’ve ditched the whole chicken version my family used in days gone by. I go for boneless, skinless breasts and thighs … let the butcher do it! I have made this with a whole chicken, when I was away from home and wanted it ‘just like mom’s’, but I spent so much time scooping out bones and yuck that I got a facial. Using the prepared meat allows you to walk away for ages and never steam your glasses.

You can easily and quickly make this recipe with just one breast (of chicken) if you’re only cooking for two, but I tend to go all out so I have plenty of leftovers. I use this in burritos, nachos, salads, sandwiches – it’s incredibly versatile. If you make a large batch, you can freeze a fair bit for an even easier midweek solution. For this recipe, I gave the kids burritos with a little cheese and soft flour tortillas, I had a taco salad with the meat, cheese and salsa as dressing, and my husband opted for corn tacos. Everyone is happy! Hope you enjoy this as much as we do!

You’ll need:

  • 2 boneless, skinless chicken breasts
  • 2-4 boneless, skinless chicken thighs
  • 1 tsp vegetable oil
  • 1 cup chopped onion (I use frozen)
  • 1 cup chopped red/yellow peppers (I use frozen bell pepper mix with green if tight on time)
  • 1 medium carrot, shredded (about ½ cup if you’re using pre-shredded/julienne)
  • 1 large bunch/2 cups chopped fresh coriander/cilantro (4+ cubes if you’re using frozen)
  • 1 TB minced garlic
  • 1 tsp ground cumin
  • 1 tsp smoked paprika
  • 1 tsp dried oregano
  • ½ tsp chili powder for heat (optional)
  • 1 tsp salt
  • ½ tsp ground black pepper

For serving:

  • Tortillas, taco shells, salad, bread rolls or corn chips – your choice.
  • Shredded cheese to serve with the above as you see fit. I like Red Leicester or Double Gloucester for creaminess.

The method:

I despise chopping onions, so I’m a big fan of frozen chopped onion I can keep on hand. I’ve also found the onion and three pepper blend from the frozen section really useful for this recipe in particular, but if I can’t find it in the shop, I start with chopping the onion, a red pepper and a yellow pepper. The same goes for the carrot … I’m super lazy and buy pre-shredded, but if you’re cool doing it yourself, I recommend the cheese grater for one medium carrot.

Use a nice, big, deep pot for this one, and start with the oil, onion, peppers and garlic over a medium-high heat.

Toss in the dry spices and mix well. Add the chicken pieces and coat with the mixture before allowing it to sit for a minute and add colour.

You’ll only want to cook the chicken for a minute or two on each side, not nearly cooking through, for colour/flavour only. Once the chicken has a little golden brown on a couple of sides, add the shredded carrot and completely cover the chicken with water. The chicken will boil now until it shreds completely, as the water reduces.

While the water comes to a boil, rinse and roughly chop the cilantro/coriander, including the stalks. The more the better, in my opinion, so feel free to add up to 3 cups if you’ve used a lot of chicken. I prefer to take the time with fresh coriander here, because frozen just doesn’t have the same punch.

Add the chopped coriander to the boiling water and reduce the heat to maintain a simmer.Shredded coriander chicken for burritos & more - great Mexican cuising

This is where you can walk away for ages. Occasionally give the mixture a stir to check the chicken is still mostly covered with water. After 30-45 minutes, the chicken should break apart if pressed against the side of the pot with a wooden spoon. Every once in a while, over the course of the next 30 minutes, use your spoon to encourage the chicken into smaller pieces.

If you’re rushed for time, or just keen to help, keep the temperature a bit higher to keep a rolling boil and use two spoons to break up the chicken. If you’re happy to let the water do the work, you can keep a mild boil ‘stirring’ the meat for you for about an hour. Just be sure to check it’s not sticking on the bottom once in a while.

As the water reduces, step in and break up the meat to expose it all to the sauce before it’s gone completely. I usually find a fork isn’t necessary – just good stabbing, twisting and mashing with the wooden spoon (great for letting off a bit of aggression in a legitimate way).

Once the chicken is nicely broken up, allow the remaining water to boil away, stirring frequently at the end to avoid burring. 

The result is an easy filler for lots of different dishes. Straight from the pot, I load up a flour tortilla with a bit of shredded cheese for my kids and roll it up. They’ve been smelling it and can’t wait!

bitten-burrito

Sparkly Mummy
Design a site like this with WordPress.com
Get started