Walk-away Alfredo Chicken and Broccoli recipe

Slow cookers are a fabulous timesaver, and one I use more and more as school runs and schedules get into full swing. This is a great back-to-school recipe that can be modified to suit your needs.

We’re a gluten-free household (when my husband’s home), so this recipe features an easy, homemade alfredo sauce that’s gluten free, and gluten-free pasta. You’re more than welcome to use your favourite pasta, and a jar of alfredo sauce, but this easy white sauce may make you think twice about all the other ingredients thrown in with jar sauces.

My kids are both in morning classes, so I use this recipe to start just after lunch time for dinner later (2.5 hours). If your schedule means you need to start it in the morning, go for LOW to allow 5 hours. If you find the pasta gets too mushy (GF pasta can usually handle it), cook the pasta separately 20 minutes before serving, and skip the chicken stock at the end.

You’ll need:

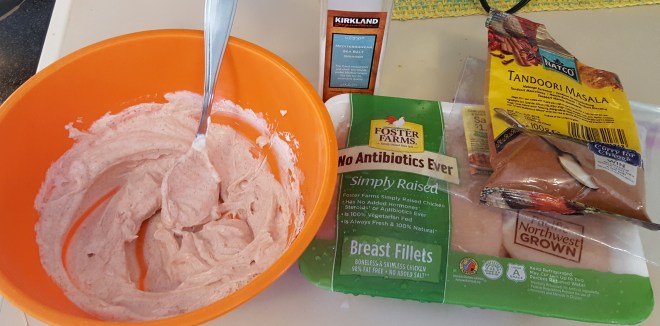
  • 3 boneless chicken breasts
  • ¼ cup chopped white onion (frozen is fine)
  • 1.5 cup frozen broccoli florets (about 6-8 big pieces, hard to measure)
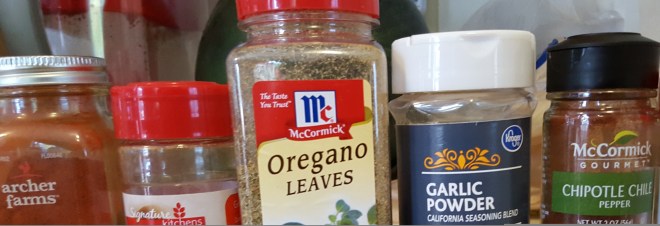
  • ½ tsp garlic powder
  • ½ tsp black pepper
  • 1 tsp oregano
  • 2 cups double cream
  • ½ cup butter
  • 2 TB cream cheese
  • 1 cup grated parmesan
  • 1 tsp black pepper
  • 1 tsp basil pesto
  • 1 cube or 1 tsp concentrated chicken stock (GF)
  • 1.5-2 cups water
  • 340g/12oz penne pasta (GF)
  • salt and pepper to taste

The method:

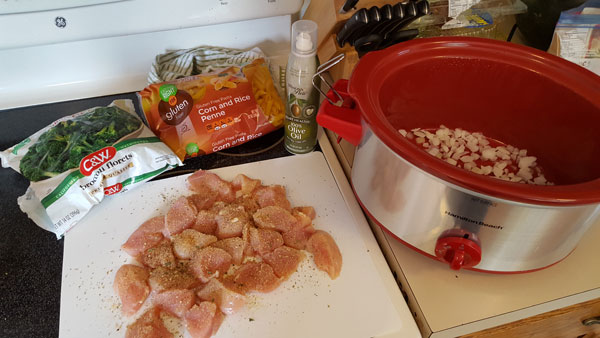
First things first, give the slow cooker a bit of cooking spray, if you like, and spread the onions across the bottom of the pot.

Dice the chicken breasts into large cubes, trying to keep a similar size for uniform cooking. Spread the chicken cubes on the chopping board and shake on the oregano, black pepper and garlic powder before adding the spiced chicken to the pot.

Slow cooker alfredo prep
Layer in your broccoli, turn the cooker onto HIGH and cover
.

Next, I make the alfredo sauce, it takes about ten minutes total. You can opt for a jar, but this is really very simple.

Using a saucepan on a medium heat, I add the butter, cream cheese and cream.

Stir the butter and a cream cheese until smooth within the cream using a rubber spatula to clean the edges and bottom of the pan.

Add the pesto and mix into the cream before adding the grated cheese.

If you wanted to stop now, you could use this sauce over pasta any time, but for this recipe, we’re going to add the chicken stock for cooking the pasta.

Add the chicken stock with water to the alfredo sauce (I know – what? But trust me). You can mix the stock in a mug first, but I just mix in the concentrate and then top it off with the kettle, right there in the pan.

Turn off the heat once the mixture is smooth (a little oil displacement is fine).

Layer the uncooked pasta onto the broccoli, pour your sauce with stock into the cooker, covering the contents. If the pasta isn’t covered, stir the layers to bring the broccoli to the top, as it doesn’t need to be submerged. Add a little more water if you need to cover the pasta, but tread lightly.

If you prefer the jar option, I suggest mixing the alfredo with the chicken stock before adding it to the slow cooker.

Slow cooker alfredo just before turning it on

Top tip: For added flavour, add bacon bits to the recipe. I keep leftover bacon  (if there ever is any) after I’ve oven baked a tray full at 180C/375F for cooked breakfast.

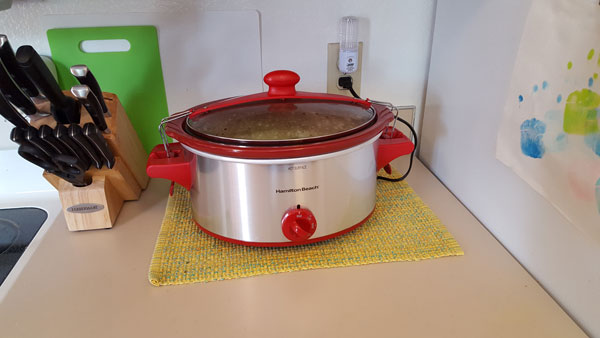
Cover the cooker, and walk away. This will slowly grow over the next hour. If you happen to be home and walk by, feel free to push any stray noodles down, but by and large, this dish is happy to tick along in the background. It’ll be ready to serve after two hours if the chicken is smaller, 2.5 if larger chunks. Please be sure to check the chicken is cooked through; pressing it against the side of the pot with a spoon should break the chicken easily.

Turn off or onto warm after 2 hours (5 hours if LOW temperature setting) and enjoy! It’s an all in one, so scoop onto a plate or bowl whenever your family are ready to eat.

Slow cooker doing some slow cooking

This dish can be done in the oven as well, at 180C/375F in a deep dish with a cover, or tightly wrapped with foil. You’ll want to spray a non-stick or grease the pan, and may need to check and stir it after half an hour. Cut the chicken a bit smaller and it should be done in 45 min to an hour.
Sparkly Mummy

Easy Cheesy Chilli con Carne

I’m a sucker for a good chilli, not too beany, full of flavour and options for serving. You can serve this in a bowl with toppings, in a wrap, over corn chips, in a taco salad or just over a bit of white rice. I’ve adapted this recipe as a quick, midweek, family meal that can be used in different ways over a couple of days.

I tend to make my own chilli powder (little dash of this, little dash of that, into the pot), but you can use your favourite pre-mix from a packet.You can save your family from anti-caking agents and colours by using your own spice mix, so I’ve provided my mix below. Please feel free to stick to your own methods though, if you prefer to use a little veg oil when browning and a packet of chilli spice mix – no judgement here!Spices for chilli

I use frozen veg (F) and tins, even squeezy tubes of coriander if I don’t have time to chop. There are a couple of ingredients that are optional, mostly because they may not be readily available in the UK. That being said, before I left, places like Tesco and Sainsbury’s were offering decent Mexican food selections, so you may luck out!

As with most of my recipes, I like to be in control of oil, salt, sugar and additives, so I’ll offer tips to avoid packet mixes and too much of the yuck that comes with ready meals. If you can get your hands on a nice, deep, non-stick pot, you won’t need oil for browning the beef.

My kids love this dish in a tortilla wrap with cheese; my husband and I prefer to dash some hot sauce in our bowl of chilli and top it with cheese and crème fraîche, or soured cream, and a handful of corn chips. It’s also awesome on a jacket potato, and who doesn’t love a homemade chilli dog?

You’ll need:

  • 1lb minced beef (half a kilo or so). Vegetarians could use Quorn or just extra beans.
  • 1 cup chopped white onion (F)
  • 1 TB chopped/minced garlic (I buy massive jars to keep in the fridge)
  • 1 small tin (7oz/198g) diced green chilies, mild and fire roasted if you can find them (OPTIONAL) (I used to just hand chop long green chilies that I found at my local high street market)
  • 1-2 TB chilli spice mix (I use dry cumin, oregano, smoked paprika, garlic, chipotle chilli – you may find peri peri easier to find – and cinnamon)
  • 1.5 tins of crushed tomato (A tin is usually 400g. In the US, I use 3 8oz tins)
  • 1 cube dry beef stock or 1 TB concentrated beef stock (Knorr have fab little jelly pots of beef stock that work well)
  • 1 cup shredded/grated carrot
  • 1 small tin cannellini beans (That’s about 200g or 8oz. You could use a large 400g tin if you like lots of beans. If you prefer kidney beans, go for it, but I’m not a fan of the skins on them)
  • 2 heaped tsp cane sugar
  • 1 cup roughly chopped fresh coriander/cilantro (seems like a lot, but really it’s just two handfuls. Alternatively, use 1 TB of squeezy tube or a large chunk of frozen chopped)
  • 1-2 TB refried beans from a tin
  • Dash of Worcestershire Sauce (OPTIONAL at the end)
  • Salt and Pepper to taste
  • 2 cups shredded cheese (or more!). I prefer non-greasy cheeses like double Gloucester or Red Leicestershire as a topping.
  • A few TB crème fraîche or soured cream (OPTIONAL topping, but so delicious, it’s worth a try)
  • Salted corn tortilla chips (Optional, but yummy)
  • 2-4 flour tortillas (Optional, if your kids like a wrap, like mine. You can use white rice if you prefer, and you can make a pot while the chilli is cooking)

The method:

I use a deep, non-stick pot for this dish, and keep the lid handy. It’s like a camel – it will spit!

Spread the chopped onion across the bottom of the pot over a high heat. If using frozen, add the onions before turning on the heat, and then go about gathering your other ingredients so they thaw a bit.

Add the minced beef and garlic, and give it all a good mix to combine. You won’t need oil if you’re using a non-stick base.

If you’ve managed to find some mild green chilies, now is the time to add these beauties – for depth of flavour, not heat.

Chilli mince cooking
There’s something really satisfying about browning meat.

If you want to make your own spice mix, put them all together is a little dish as follows, in order of quantity (but adjust to your own taste): Almost 1 tsp cumin, then slightly less paprika, oregano, garlic, a tiny dash of chipotle chille (or peri-peri if you like) and an even tinier dash of cinnamon. The cinnamon really goes a long way, so tread lightly.

As everything starts heating up and producing liquid (try to go for low-fat content beef), add the spice mix you’ve just made or your packet mix.

As the onions, beef and minced garlic brown up, and the dry spices dry up the liquid, stir pretty continuously (especially if you haven’t used oil). Have your tins of tomato at the ready to dump in, and reduce the temp before burning.

Add the tomato and reduce the heat to medium. Give the mixture a good stir and cover it. Mind the spitting!

Add the dry, crushed stock cube or concentrated stock (no water added), drained can of cannellini beans and the shredded carrot.

Sprinkle in the sugar (to taste, but man that’s a lot of tomato, so be generous, it’s still less than ready made), a splash of water (only about a ¼ cup), give the mixture a good last stir, reduce the heat to med-low and cover.

If you have fresh coriander, give it a good rinse, remove the lower stalks, but don’t worry about the upper stalks between leaves. I roll up the coriander in a little sausage before finely chopping along the tube for a rough chop in seconds. The upper stalks will add flavour without being stringy, so don’t worry about separating leaves from the stalk.

chopping coriander
You don’t need to take the leaves off the stalks when preparing coriander.

Add the coriander/cilantro and mix in well before re-covering.

The carrots will soften, the tomato will mellow and the beans will virtually disappear over the next ten minutes. Keep the kettle handy in case you feel like another drop of water will help soften the carrots or prevent bottom sticking, but try not add too much.

After about 15 minutes, the chilli will have reduced a bit, but it’s still likely to be a bit more liquid than we’d like. This is where the refried beans come in. Stir in the refried beans a little at a time to help thicken the mixture, mellow the tomato and spices, and add fibre.

Give it a little taste and add salt and pepper if you like. Again, it’s a lot of tomato, so salt is likely necessary, but remember, it’s also in the beef stock and refried beans. I add a dash of Worcestershire sauce, as well as salt at this point, and give it good stir. There’s something about the Worcester that brings out the beef!

This chilli can carry on cooking, unattended, on very low heat, until you’re ready to eat, but it’ll be ready in half an hour, no problem.

In a cereal/salad sized bowl, mix the following:

  • 2 scoops (about 1 cup) of the chilli from the pot
  • A generous handful (about ½ cup) shredded cheese
  • 1 tsp crème fresh or soured cream

This instantlyHand holding tortilla chip with dip cools the chilli, mellows any spices they may be adverse to, and makes a handy all-in-one burrito filler that avoids the cheese falling out! Spread the mixture onto a tortilla, wrap it up and cut (or don’t) depending on your kid’s fondness for forks. If there’s a little left over, it’s perfect for dipping tortilla chips for mom bites.

My hubby and I have a bowl of chilli with a handful of cheese, dab of crème fraîche and some crunched up tortilla chips on top. Great for next day lunches over a jacket potato or with a salad. We’ve even made nachos with tortilla chips and cheese for a heavenly snack. Hope you enjoy it as much as we do!

Sparkly Mummy

A day of easy meals for busy days with the kids

Ok, these aren’t recipes, so much as assembly instructions, so I’ve decided to do a whole days worth of meal ideas. My husband travels a lot for work, so I’m a part-time lone parent, and therefore the only chef. Some days I need quick, but healthy meals that require little-to-no brain power. Here’s what a day after my husband has been gone for a week or two looks like in my house.

Breakfast: porridge (Americans call it oatmeal)

You’ll need:

  • 1 or 2 packets of plain/original/no flavour instant microwave porridge/oatmeal
  • 1 banana
  • 1 level tsp brown sugar or maple syrup
  • 6-10 fresh or frozen blueberries
  • 1 to 2 cups milk

Method:

Some people are against microwaves; I’m not one of them. Instant oats are awesome and can be made so many ways. I go for original so I can control the sugar. You can also use apple sauce instead of the banana, cinnamon apple sauce if the kids like it, and even jam or raisins. I don’t use the blueberries if I don’t have them on hand, but the banana is omnipresent.

Use a microwave-safe bowl that’s nice and deep, and depending on if you’re using 1 or 2 packets of oatmeal, use half or the whole banana.

Smash the banana with a fork until mostly smooth. Sprinkle or pour in the sugar or syrup and give it a quick stir.

Add in the dry oats and cover with cold milk.

Drop in fresh or frozen blueberries (or raisins), but a few will go far.

Give it all a final stir and cover with kitchen roll/paper towel in the microwave.

Cook on high for 1.5 min and then stir the mixture. If it’s already getting dry, add another splash of milk or water. Stick it back in the microwave for 1-2 minutes more, depending on whether you’ve used fresh or frozen berries.

oatmeal
Ok, so this isn’t exactly a food porn pic. It’s just oatmeal – but I promise it’s tasty.

Give the mixture a stir and try to squish a berry on the side of the bowl. It should explode easily and mix in pretty purple swirls. Let it rest for about 5 minutes.

Check the temperature; if it’s still too hot, feel free to add another slash of cold milk to cool it if the kids can’t wait.

If I use 2 packets, this will feed all three of us, easily. It’s an easy way to add fibre and potassium, vitamins and calcium to a one-bowl breakfast. And it’s something you can experiment with – use fruit you love!

Lunch: quesadilla and grapes

You’ll need:

  • 4 or 6 flour tortillas
  • 4 cups Red Leicester or Double Gloucester cheese, grated
  • Two handfuls of seedless grapes

Method:

Some people go for grilled/toasted cheese and soup as a lunchtime comfort meal. I grew up with quesadilla and grapes. The tortillas are lighter than bread, and you don’t need butter to toast it up. I lived in England long enough to know that Red Leicester and Double Gloucester cheeses are the creamier, less oil-producing cheeses perfect for this job. Trust me: ditch the cheddar just this once. And who doesn’t like cheese and grapes? The red seedless are my kids absolute favourite.

First things first, you can buy pre-shredded cheese, or grate your own, but be sure to grate straight from the fridge so it doesn’t smudge all over the grater.

Put a griddle or wide pan on to warm on a medium-low heat. No butter or oil necessary.

Put one tortilla onto the flat surface and pile shredded cheese onto the center.

Lightly spread the cheese towards the edges but don’t worry too much, it’ll spread as it melts.

cooking quesadillaTop it with a second tortilla and let it be for about a minute. Squish the top onto the bottom by pressing with your hand or a spatula, and then bravely flip the lot. It sounds scary, but using your hands isn’t crazy, because you can pinch the edges together and quickly flip the whole thing before it’s too hot. I pull it up, slide it towards me and then over backwards, reaching to the far side of the pan in a sort of wrist motion.

The cheese will start to melt nicely and the top tortilla can be pushed a bit to spread it, if you like. All in all, it shouldn’t take more than 3 or 4 minutes to have crispy outside and gooey inside.

Remove the quesadilla onto a cutting board and start again at the griddle for 1 or 2 more. Once slightly cooled, cut like a pizza into triangles and serve.

Give your grapes a wash and pat dry and serve along with the quesadilla. Serve with pressed juice watered down, and guacamole (if I can be bothered). I’ve also been known to spread a thin layer of refried beans onto the bottom tortilla; it adds protein and fibre, and helps the cheese stick for the first flip. I tend to keep a tin in the cupboard, and literally pop it open, stir a bit with a butter knife, and spread on like peanut butter. It may not look appetising, but it’ll add flavour and a bit of veg. You can use the rest of the tin to make chilli or burritos (watch this space for those recipes)! Quesadillas

Dinner: fish fillets, beans and mash

You’ll need:

  • 3-6 frozen fish fillets (fish fingers just don’t have enough fish for my liking – these still have crunch but more of the good stuff)
  • 1 medium sweet potato
  • Knob of butter
  • Heaping tsp of soured cream
  • Tin of baked beans
  • Salt and pepper

Method

My kids routinely eat every morsel of sweet potato mash, but leave white mash on the plate. This ‘recipe’ is a great introduction to how naturally sweet these beauties can be.

Preheat the oven to the temperature recommended on the packet of fish (usually around 200c/390f).

Rinse your sweet potato and poke it in a few places, then put it in the microwave for about 3 minutes. You don’t want to cook it through – just get it started.

Spread your fish fillets onto the baking tray and into the oven once heated to temp.

Place a piece of aluminium foil onto the oven rack and the potato onto that. This will finish the sweet potato in time with the fish, and allows natural sugars to caramelise.

While the fish and potato bake, get your baked beans going on the stove (or microwave with a cover), to warm through. I used to add a tiny bit of brown sugar or maple syrup to baked beans in the UK, because I’m used to southern style beans, but use whatever tastes good to you.

Once you’ve removed the fish as per their instructions, check if the sweet potato is leaking juices – good stuff! The foil now comes in handy to save your oven from juices, and to help your oven mitt as you grab it out.

Let the fish cool and slice open the potato. Scoop it out of the skin and into a deep cereal bowl.

Add the butter and stir to smooth big lumps out of the potato.

Add the soured cream and stir well. You can add a splash of milk if you want a creamier mash; it usually depends on the potato itself.

Add salt and pepper to taste.

Plate up the baked beans, cut the fish into bite-size pieces, add a scoop of mash, and Bob’s your uncle!

Mash is great ‘glue’ for beginner eaters. And the virtuous sweet potato has more vitamins and fewer carbs than white potato. Something we can all enjoy!

fish dinner

I’m not saying it’s the most creative menu, but it’s full of little cheats that keep me away from fast food. There’s a way to moderate the sugar and salt, get some nutrients into them, and it’s food I know they’ll eat. Sometimes that enough! 

Sparkly Mummy

Tandoori Chicken and Coconut Lentils

Try this instead of a take-away. Great for kids too!

After a decade in England, I feel like Indian cuisine is a staple in my home. Since we don’t have our local delivery any more, I’ve taken to making my own favourite dishes, getting closer and closer to a curry house flavour. Luckily, my kids were very young when they were first introduced to tandoori and dahl (lentils), one of my preferred mild dishes too, so making it at home is very familiar and comforting to us all.

I usually make this when it’s a good day to grill. The chicken can be done in the oven (200C/450F for 20 minutes), but it tastes amazing if it’s been fired up. If you’re super organised, you can put together the chicken and yogurt to marinate all day or overnight, but giving it a good thirty minutes is still fine. I let the chicken tenderise in the yogurt for at least as long as it takes to finish the lentils and rice, so it’s nice and hot of the grill for serving. The lentils will just get better the longer they simmer, and you can top it up with a bit of water all day long.

Tandoori chicken on the grill.jpg

Now, it’s worth noting that in the UK, you’re more likely to find Tandoori Masala pre-mixed, but it can be achieved in the States, or you could make your own mix. Local Indian groceries are always well stocked with spices, ghee, rice and lentils at fabulous prices. They usually even have the coconut milk priced more competitively, and certainly bulk buying rice and lentils is an economic no-brainer. I found a brilliant little shop right here in my own Seattle suburb, so try a visit to the little guy and you may be pleasantly surprised at their selection and prices. Most pre-mix Tandoori will be mostly E-numbers to achieve that Tandoori orange, so feel free to simply mix dry spices (see below) for the same, additive-free, flavour.

You’ll need:

Chicken

  • 3 large boneless chicken breasts (or on the bone if you have more time to grill)
  • 3-4 TB Greek yogurt
  • 1 heaped TB Tandoori Masala or a dry mix of turmeric, coriander, ginger, paprika, cardamom, cinnamon, cumin, salt and chili powder (a good shake of each into a small bowl usually does the trick and allows you to add more of the flavours you enjoy most)

Tandoori chicken ingredients

Dahl

  • 1 cup chopped white onion (frozen is fine) / 1 medium onion
  • 5 cups/800g red lentils/masoor dahl
  • 1 cup shredded or julienned carrot (approx. 1 medium carrot)
  • 1 heaped tsp minced/grated garlic (I buy large jars of minced garlic)
  • 1 heaped tsp minced/grated ginger (this really is best freshly grated)
  • 1 heaped TB Tandoori Masala or mix as above
  • 2 TB ghee (clarified butter) or 1 TB vegetable oil
  • 1 cube dry chicken stock or 1 tsp concentrated stock
  • 400 ml tin of unsweetened, first-pressed coconut milk (don’t bother with low fat versions, you want the cream)
  • 1 tsp brown or muscovado sugar
  • 2-4 cups water

Dahl ingredients

Rice

  • 2 cups/400g jasmine rice
  • 4 cups chicken stock (1 cube dry stock in 4 cups water)
  • 1 cup frozen peas (optional)

First things first, you can slice the chicken into large cubes, or buy chicken tenders to save time, but be sure the pieces won’t fall through the grill (if you’re using a bbq).

Mix the yogurt and dry spice together well in a large mixing bowl before adding the raw chicken. Give it a good mix to really coat the chicken, and then cover the bowl with cling film/plastic wrap and find a space in the fridge.

The longer the chicken has a chance to canoodle with the yogurt, the better. Don’t worry if it doesn’t look bright orange, you don’t need that much ‘stuff’ in your dinner.

Once your chicken is set aside, give your lentils a really good rinse. This is not a step to be missed, because the lentils will be ‘dusty’, and they will produce a bubbly foam when boiling if you don’t. (I usually use a small strainer inside a larger bowl to submerge the lentils and shake ‘em up under water 4 or 5 times, until the water I’m draining is clear.)

Next step, start your onions in the ghee or oil over a med-high heat. I suggest using a wide based pot or pan so you get more browning and less stewing. (I wouldn’t suggest trying to use normal butter if you can’t find ghee, it’s just going to burn.)

As the onions just begin to sizzle, add the garlic, ginger and dry spices and stir it pretty continuously to avoid the dry spices burning.

Add the lentils, carrots and dry or concentrated chicken stock and coat everything with the onion/spice mixture before adding about 1.5 cup of water and reducing the heat to med-low.

Coconut milkOpen the tin of coconut milk and, if you’re lucky, the cream will be separated from the water. Put a small whole on one side and larger whole on the other to drain just the water, holding your spoon in the way to keep back the cream. If it hasn’t separated, it’s no biggy, just add the whole can. If it has, keep the near solid cream for adding at the end.

The reason I try to keep the cream until the end, it doesn’t need to reduce with the rest of the water, and adds a smoothness to the dahl. Let me stress, though, that this isn’t a necessary step, just a texture enhancer.

Once you’ve added the coconut water, reduce and cover for about ten minutes.

Now is the perfect time to start your rice. I just make a standard pot of rice, but use chicken stock instead of water. This adds flavour, salt and fat in one step, instead of using butter, salt and water. I’ve also been known to add about a cup of frozen peas to rice from the beginning, as well as a pinch of cardamom powder, but these are optional. I try to use veg anywhere I can, and even the smallest bit of flavour cooked into the rice is very kid-friendly.

Stir your dahl occasionally to be sure it doesn’t stick to the bottom, adding a bit of water to keep it from getting too dry if needed. Once the lentils and carrots are nice and soft, taste test to add any salt and a teaspoon or so of the brown sugar. Allow the mixture to bubble a bit longer and then add the coconut cream if you’ve held it back. Mix in thoroughly and then turn the heat to the lowest heat, just to maintain the warmth. The dahl will stay liquid as long as the lid is kept on while you grill the chicken, but the moisture will escape and dry it out if you leave it uncovered for long.

Dahl in the pan.jpgTurn off your rice when it’s tender, but leave it covered until time to serve.

On a high grill flame, place the chicken pieces nicely spread apart onto a greased grill (I usually use a bit of veg oil on a paper towel/kitchen roll and wipe the grill before I turn it on). Keep the lid closed for about 5-7 minutes and then turn the chicken over and repeat. The less you move the pieces, the better you’ll be at getting crispy bits and a bit of yogurt char. Yum.

Depending on the size of the pieces, 10-15 minutes should be plenty, with one roll over in the middle and keeping the lid closed. Be careful not to overcook the chicken in pursuit of char, it’s better to have moist chicken. If in doubt, always cut open your biggest piece first to check it’s cooked through.

My kids can’t get enough of the coconut dahl served over rice, and I cut up a piece of the chicken into tiny pieces mixed in if they’re interested. I don’t worry if they aren’t up for the chicken, though, because lentils have protein and are super healthy. And filling! Our whole family love this meal, and it all makes for great leftovers. I love to nibble the cold chicken bites (if any are left) the next day, and a scoop of rice and dahl in the microwave makes for a two minute lunch/dinner!

Tandoori chicken and coconut lentils

Mummy in a Tutu

Quick & sneaky nutrition for kids – Smoothies

An easy way to get more good stuff into picky eaters

Every parent will have those days when they aren’t 100% sure their toddler has or will ingest the daily recommended doses of healthy food. It’s especially likely during those, “I only eat cheerios” phases, and all the wisdom in the world that kids eat what they need isn’t reassuring. Being an essentially lazy mummy, however concerned with nutrition I may be, I’ve found my go-to solution, rain or shine.

Behold, the smoothie.smoothie

My kids think it’s the most amazing treat, and I make a lot of different versions based on what I have available, so it’s never boring!

I always keep full fat yogurt – vanilla or strawberry are favourites – in the fridge, and tend to keep frozen berries on hand as well. My daughter loves bananas, but sometimes only eats half, so I often keep the bottom half to throw in a smoothie later.

It’s also useful to note that I buy pressed juices (fibre/no sugar!) and water them down by at least half when I give my kids juice. So I’ve usually got apple, mango or berry blends in the fridge already too. These days, they’re selling amazing smoothies that are all fruit (e.g. Naked Fruit in the USA or Innocent in the UK), and are still delicious watered down for kids.

But if you’re keen to make sure the kiddos are getting a protein, vitamin, fibre dose all-in-one, this smoothie is the way to go.

Blend together until sippy cup or straw-friendly:

  • 1 (or 1.5) banana
  • 2 or 3 tablespoons of full fat yogurt, vanilla or flavour of choice
  • Handful or two of frozen or fresh berries (blueberries are super foods!)
  • Approximately 1-1.5 cup pressed juice of choice (apple and mango are great choices, but grape, or other non acidic juices work well)
  • Approximately 1 cup of milk
  • Honey to taste if berries are tart – local honey can help allergies!

MinBlenderd you, any fruit on hand is smoothie fodder. In season, I’ll use peaches, mango or melon, which my kids find weird to eat in pieces, but love to drink.

Some people say add spinach or kale, or other veg, but I would recommend only adding a tiny bit of spinach if you’re really keen. Kale is too bitter and they’ll reject the whole thing. I added a bit of leftover sweet potato once, but it was a bit thick. Make it your own, though – if your kids like it, all the better!

One thing’s for sure, I rely on this morning, noon and night, not the same day, but you see what I’m saying. If we’re going to a party and I know my kids will be too distracted to eat: smoothie. If they’ve been grumpy about breakfast and we’re almost out the door for several hours: smoothie. It takes five minutes to make and is portable. And if you tend to forget to eat yourself, like me, there’s enough for you too.

Mummy in a Tutu
This blog has been verified by Rise: Re985c64212df908e7d5ad44521840a3e

Spag-Bol with hidden veg in 27 minutes

A classic recipe with extra veg and secret tricks for speediness

The Mum Reviews says:

The email with my mate’s recipe here came in literally as I was sitting down to eat a spag bol made by mixing browned mince with a shop-bought jar of sauce. It was pretty good and tasty, tbh, but I can’t wait to try this recipe, which sounds just as fast and (almost) as easy. I love that it has spinach in it for extra hidden veg.

Ok, so I timed myself for this one, because I know there are days when even a 30-minute meal seems like too long. But this one is totally worth it, and should feed a family of 4 for two days! I use frozen veg where possible, so 30 minutes is plenty of time because you don’t need to spend time chopping. If you prefer to use fresh veg, you could also speed things up by using a food processor to chop the veg.

I find a lot of spaghetti sauces too sweet and have too much tomato, so this is a really light alternative with a lot of flavour.

 TOP TIP: If you use angel hair pasta (this is like thinner spaghetti, called spaghettini or capellini in the UK), you can use a much smaller pot and less water, which is much quicker to boil. You can break the pasta in half and add in two or three handfuls to the water, there’s plenty of room, and it only takes 3-5 minutes to finish! I usually use half a box at a time.

You’ll need:

  • 500g/1lb mince/ground beef OR (for a richer flavour) ground sausage/sausage meat
  • 1 cube beef or chicken stock as per beef or sausage, or 1 tsp concentrated stock (without the water!)
  • 1 cup/130g chopped white onion, or about 1 medium onion (Frozen is quickest)
  • 2 tsp green/basil pesto
  • 1 tsp dried oregano
  • 1 tsp dried mixed Italian spices (that’s rosemary, thyme & basil if you want to mix your own)
  • 2 tsp minced garlic OR one clove (buy it in a jar, tube or dried to save time)
  • One medium carrot OR 1/2c./60g pre-shredded carrot
  • 2 tins chopped tomato (in the US that’s petite diced or crushed)
  • 1/2 cup / 60g frozen chopped spinach (or 1 small bag fresh baby spinach)
  • 1 tsp tomato paste (optional)
  • fresh basil (optional)
  • salt and pepper
  • 225g dry pasta

The Method

I usually get the frozen onions into the pan while it heats up to high temperature, then fill the little pot with water for the pasta and turn that on high to start boiling. If you live in the UK, you will obvs boil your water in the kettle before putting it in the pan.

In a wide pan or pot, brown together the meat, stock, onion, oregano, spices, garlic and pesto. You don’t need to add extra oil as this will come from the pesto. Mix the ingredients together but then only stir occasionally to deeply brown.

Spag Bol cookingTo the browned meat, add the tins of tomato, 1 tin of water, carrot, spinach and tomato paste. Allow the sauce to reduce at a med/low temperature, the lid slightly askew to stop splatters but still allow the reduction.

At this point, the water should have come to the boil and you may have added your pasta. While the sauce reduces by about a third, stir and drain your pasta; the thin stuff only takes 3-5 minutes, so don’t let it get over done. Rinse and drain the pasta while the sauce bubbles off a bit more water, and now you may want to roughly chop a bit of fresh basil.

Be sure to taste test your sauce and add salt, pepper and a handful of roughly chopped basil, to taste.

Reduce heat and allow to simmer until the sauce is your desired consistency. We usually use gluten free pasta, so the taste of the pasta is improved if I add it to the sauce whilst it’s still a bit watery.

Once you’ve drained your chosen pasta (my kids just love angel hair and it’s easy to cut into tiny bits for little ones!), I always find it’s best to toss the pasta into the sauce before serving, but either way, it’s delicious! They never even notice all the veg!

TOP TIP: For younger children, allow the sauce to simmer longer to soften the carrots, and try crushed tomato to avoid ‘bits’. I’ve also been known to add a pinch of caster sugar to reduce the acidity of the tomato for youngsters who like it sweet.

Easy Cottage Pie (with a twist) Recipe

Great for kids and busy mums

The Mum Reviews says:

It looks like a lot of ingredients but many are optional and you can just throw everything in! You don’t even need to put it in the oven if you’re short on time. I love the funky mash with added sour cream and cheese.

What you need

  • 6 white potatoes (Maris Piper is good if you’re in the UK)
  • 1 sweet potato (optional)
  • Approx 500g / 1-1.5lb mince (that’s ground beef in the USA)
  • 1 cup onion, chopped (or 1 medium onion)
  • 1 cup carrots, chopped (about 1 medium carrot)
  • Oregano & Thyme (or mixed Italian Seasoning)
  • Worcestershire Sauce
  • Beef stock
  • Garlic, fresh, dried or minced (optional)
  • 1 tsp tomato paste (optional)
  • 1/4 cup (85g) butter
  • 1/4 cup (60ml) sour cream
  • 1/2 cup (120ml) milk or cream (half & half is also an option in the USA)
  • Corn starch
  • Salt & pepper

Method

SpicesPreheat the oven to 375F/180C (however as you’ll see later, using the oven is optional! You could also just use the grill to crisp up the top).

Bring a big pot of water to boil and peel and cube 6 white potatoes for mash. I sometimes add one sweet potato to the mash, but cook it whole in the
microwave for 4 minutes or so rather than boil.

You can save time and peel only spotty bits of skin for a rustic mash too. Or, for a real shortcut, you can use ready mash; some chiller section mash only has milk, butter, cream and potatoes, so isn’t too guilt ridden.

While the potatoes boil, start browning the ground/minced beef. I use higher fat beef to avoid the need to add extra Cottage Pie filling on the hoboil.

Add the chopped onion (you can buy frozen pre-chopped onion for convenience). You can also replace some of the chopped onions with a handful of pearl onions, which sweeten up nicely.

Add healthy dashes of pepper, salt, oregano and thyme (or Italian seasoning), Worcestershire sauce and beef stock (I use 1 cube or 1 tsp of the jar of concentrated stock). You should add as much or as little as you like to taste, but I do use a lot of dry spice to flavour the meat while frying it off. You can also add about 1 clove of garlic or 1 tsp of dried/ready minced garlic (to taste) at this point too.

I try not to stir too much so the meat browns nicely, but if the dry spice starts to burn, add a touch more Worcestershire or water.

When the meat is brown and the onions are soft, add about ½ cup water and about 1 cup chopped carrots (I get the julienned carrots Shredded carrotsand chop them a little smaller, but you could leave them big if you prefer).

Add the frozen peas (you can add extra if they like peas – go for it!) and tomato paste (optional). Stir well and allow peas to thaw completely. Add a bit more water if the mixture is dry, but no more than ¼ cup.

Adding frozen peas to cottage pieAdd 1 or 2 tsp corn starch a little at a time, using a fork to mix it in; try shaking it in off the fork to avoid too much clumping.

Cover and reduce heat to simmer until the gravy thickens a bit. Add a dash of salt or more Worcestershire sauce to taste.

Your potatoes should be done by now (cubed ones take about 15 minutes). Drain potatoes and add ¼ cup butter (or olive oil if you prefer) to the pot and dump the potatoes back in. Add ¼ cup (or more) sour cream and smash it all together. Add milk (or cream/half  & half if you’re feeling indulgent) as you mix (up to 1/2 cup), until you’ve reached your desired thickness. Salt and pepper to taste.

For extra flavour, add a bit of shredded cheese to the mash.

Pour the meat mixture into a baking pan. Cover with mash, sprinkle with more shredded cheese for extra texture, and bake for 15-20 minutes to crisp up the top.

It’s advisable to put the pie onto another baking tray to catch any bubbly juices. Yum!

A few other tips…

In the pictures, I’ve made a two “grown up” or four toddler portion pie. I save the meat mixture to have over jacket/baked potatoes with salad in the summer if I don’t want to have the oven on too long. You can also avoid using the oven altogether if you want to simply layer the mash onto the meat in the pan and allow the sauce to simmer beneath it for a few minutes. Fast family favourites aren’t always about presentation! When my kids were younger, I made sure to make the carrots nice and small, and usually skinned the potatoes properly, but now that they’re older, it’s not necessary. There are a lot of ‘to taste’ measures here, so don’t be afraid to just toss a dash of this and that in – it’ll be a dish you make your own in no time.

Petite Pudding

Introducing The Mum Recipes

Fast, family-friendly food

The Mum Reviews says:

I’m not the best cook, and when I do make an effort, my kids are usually not impressed. So when my best friend suggested she might join me in the blogosphere, I bit her hand off. Because she CAN cook. Her kids even eat it. And it’s got vegetables! So she needs to share her secrets with the rest of us. In this post she introduces herself. Head on over to our About page for more about us, and watch this space for The Mum Recipes first recipe, Easy Cottage Pie.

Like a lot of mums these days, I try to balance my desire to feed my children healthy foods and my often overwhelming ennui. I make the effort to cook at least three times a week, and by cook, I mean something more challenging than hot dogs, baked beans and sweet potato mash. Perhaps it’s because I truly love to cook, but I suspect a lot of it is I find it a legitimate reason to tell my children to “get out of the kitchen!” for a much needed moment by the end of the day. It’s because I’m sometimes horrified when I have the spare moment to inspect an ingredients label on pre-made ready-meals, and realise my kids don’t actually like them when I’ve tried in a moment of weakness. What I’ve learned is to find a balance between the convenience foods available and making healthy meals.

I thought it might make cooking easier for some of the time-strapped mums out there that have all the best intentions, really want their children to prefer home-cooked meals to take-aways, but haven’t had the time to experiment like I have. I’m a stay-at-home mum with two small children (5 and 3) and a gluten-intolerant husband, so I’m no stranger to catering specialty meals. I did, however, make a rule a long time ago that my children were going to eat grown-up food. Nothing too spicy, no chillies just yet, but plenty of spice is a must. I used a food processor to liquefy spag-bol, lentils with rice, cottage pie, etc. As a result, my kids are pretty accustomed to garlic, onion and dry spices in most dishes. They don’t, however, realise just how many vegetables end up in their favourites.

In this blog, I’d like to introduce some tried and tested recipes, not just by my family, but recipes I’ve been asked again and again to share. I use frozen veg when I need to, I don’t mess around with name brands when generic will do, and I’m always looking for the easiest, quickest result for dinner time chaos. I hope you find the tips and recipes I’ll share here help ease the stress of cooking healthy, yummy meals.

Design a site like this with WordPress.com
Get started